Recorded or Recording-Based Authentication is a newly added method that can help you when scanning websites with a non-standard authentication.
Complex web applications require the ability to load dynamic pages and components. For an automated scanner to be able to authenticate a specific asset, it is necessary to fulfill these requirements. The Recorded method uses Selenium technology to record user events when logging into the account used for scanning. This way you can record the authentication process and upload the recording to the website scanner.
Before starting the scan:
1) Install the Selenium browser extension
The Recorded authenticated method only works for Chrome or Firefox.
2) Log out of the target application
If authenticated, log out of the target application because it invalidates the current session which could interfere with the recording.
3) Clear Cookies and Site data
Cookies and Sita data have to be cleared (in Google Chrome) by browsing to the target, accessing the padlock icon for site information near the URL > Cookies and Site Data > Manage cookies and site data > Delete all the entries > Done.
This ensures that the browser is cleared of custom settings and responds in the same manner as to a new user.

4) Enable “Allow in incognito”
Right-click on the “Selenium IDE” extension > Managed Extensions > Enable “Allow in incognito”.
4) Record and Save Authentication
Open a new tab in incognito mode and click on the extension. Choose Record a new test in a new project in the extension pop-up. Maximize the extension window, because the recording will start maximized.

- Enter a Project name
- Enter as Base URL the Login URL
- Click Start Recording
- Go through the login process: enter a username, enter the password, click login, etc.
- Make sure to stop the recording (“Stop Recording” button) from the Extension Pop-up window (Selenium IDE) exactly after submitting the login form (clicking Login for example) and your asset has loaded. Because of this, no other additional operations that are not required in the authentication process will be stored in the recording. You can verify that no operations are stored in the recording by observing that the last record was the submit/login button.
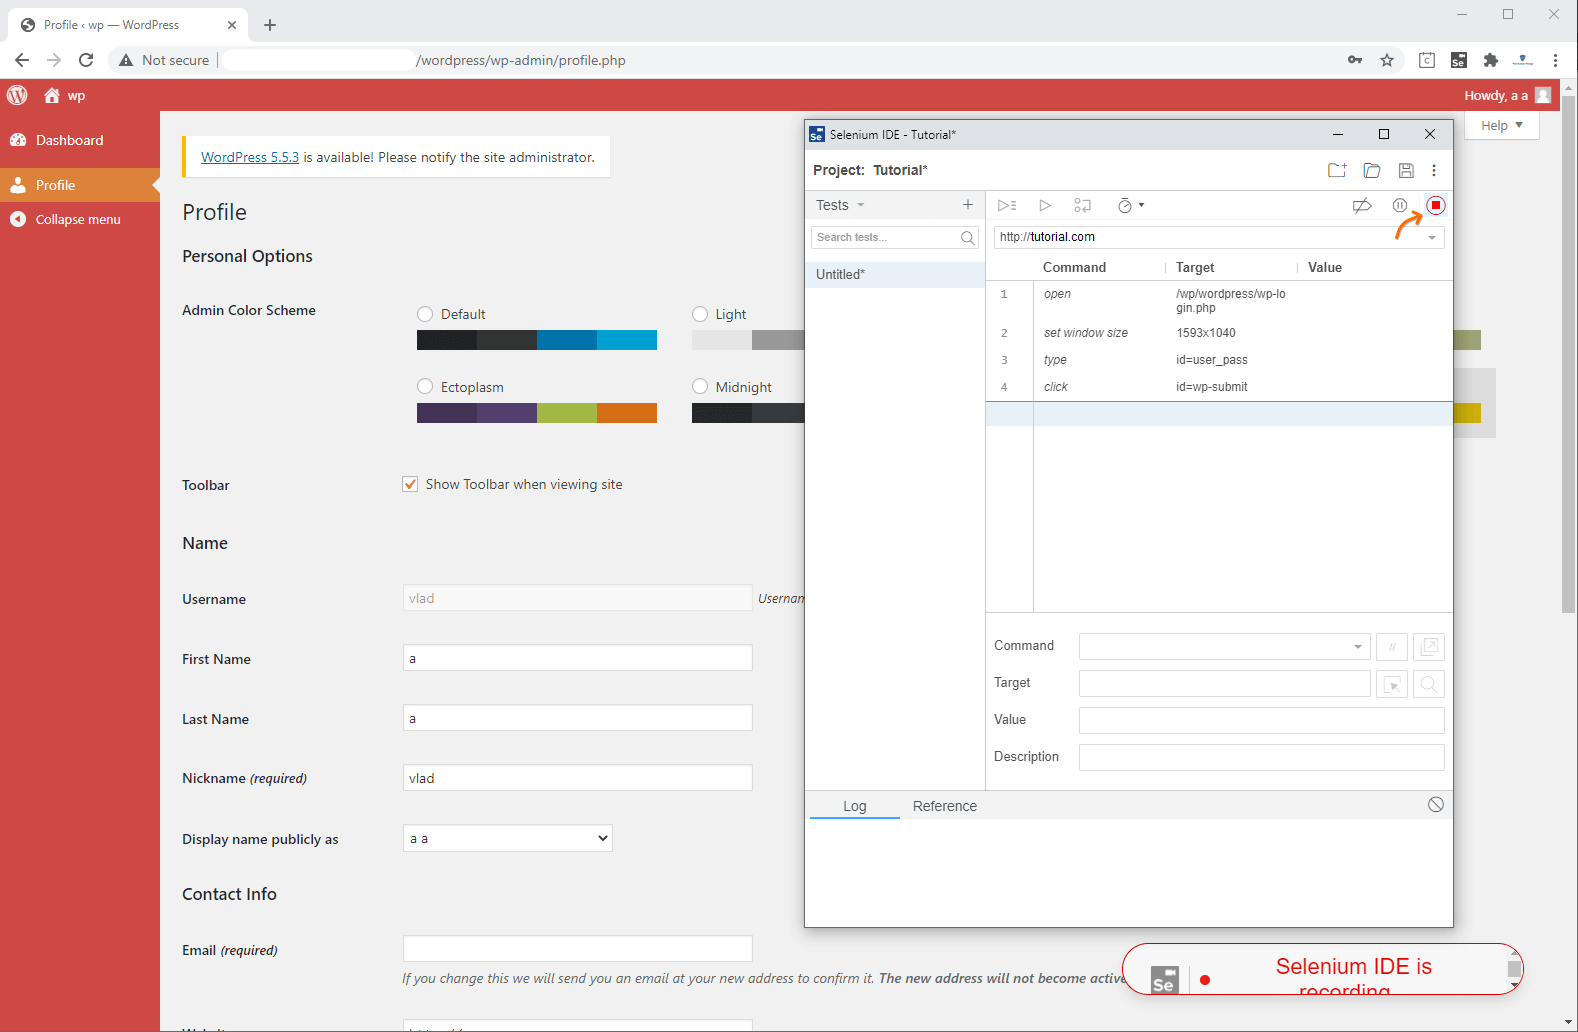
You will see an overlay with “Selenium IDE is recording” until you click Stop Recording
After stopping the recording, click Save Project and enter a name for the recording.
Starting the scan:

1) Add your target URL
This should be the URL of your asset. Make sure you’re logged out of the asset application before starting the scan.
2) Upload the recording
Upload the .side file saved in the Recorded section, as shown above.
3) Check authentication
You can use the check authentication method or start a scan directly, however, we recommend you first check that the recording is producing a successful login.
The check authentication can take a minute to complete, therefore we will ask you to not leave or refresh the page while this is running. You will see a screenshot of the application after logging in, if you believe that it is correct, you can proceed with the scan.
4) Start the Scan
Click “I am authorized to scan this asset” then start your scan.
Need more info about Authenticated scans and why you should be performing this type of scan? Read our article in the Learning Center.