You can add new assets anytime, delete old assets, or move them between workspaces
There are 4 ways to add new assets to a workspace
1. Automatically from the tool page
An asset is automatically added to your current workspace when you run a scan against it from the tool page. It will be suggested in the asset field what sort of asset you need to add for that particular scanner: IP, hostname, or URL.
2. Manually from the /assets page
You can add a single asset by clicking on the +Add button
3. Bulk import via a txt file
You can add multiple assets at once by importing a .txt file. Make sure that the text file you are uploading contains one asset per line, optionally followed by a description.
4. From the results of a discovery scan
Assets can also be added from scan results. For example, Find Subdomains. You can select the results by clicking the checkbox next to them and clicking the Add to assets button so they will be automatically added to your assets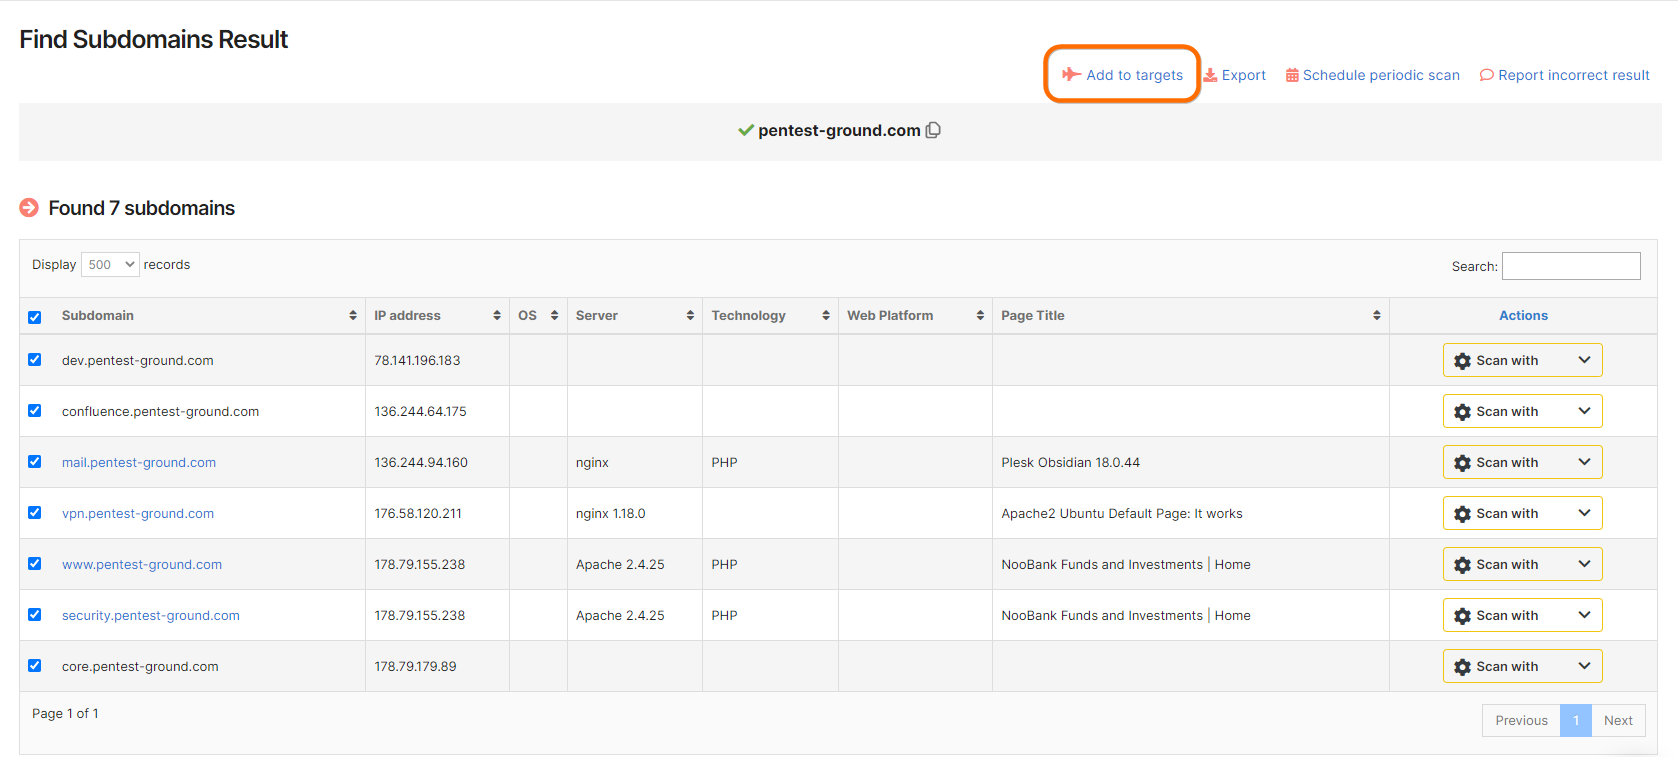
What if I reach more assets than allowed by my plan?
You have the option to delete some of your assets (including their scan results) and add new ones instead. Or you can upgrade to a higher plan, which allows you to add more assets and keep your scan history.
From the /assets page you can delete one or several assets by selecting the checkbox right next to it and clicking Delete. Be careful though, deleting an asset will also delete all its associated scans.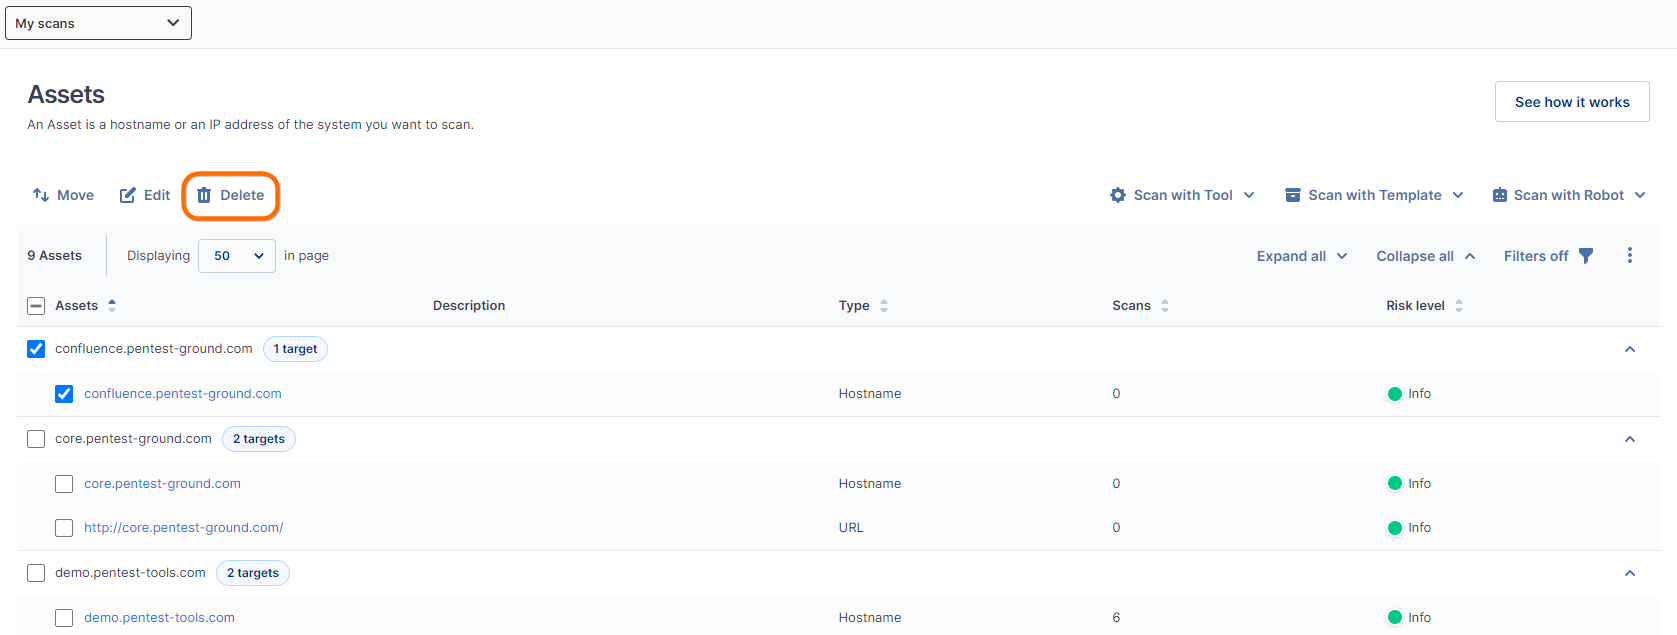
What if I added an asset in the wrong workspace?
You can move one or several assets to another workspace by clicking the Move button.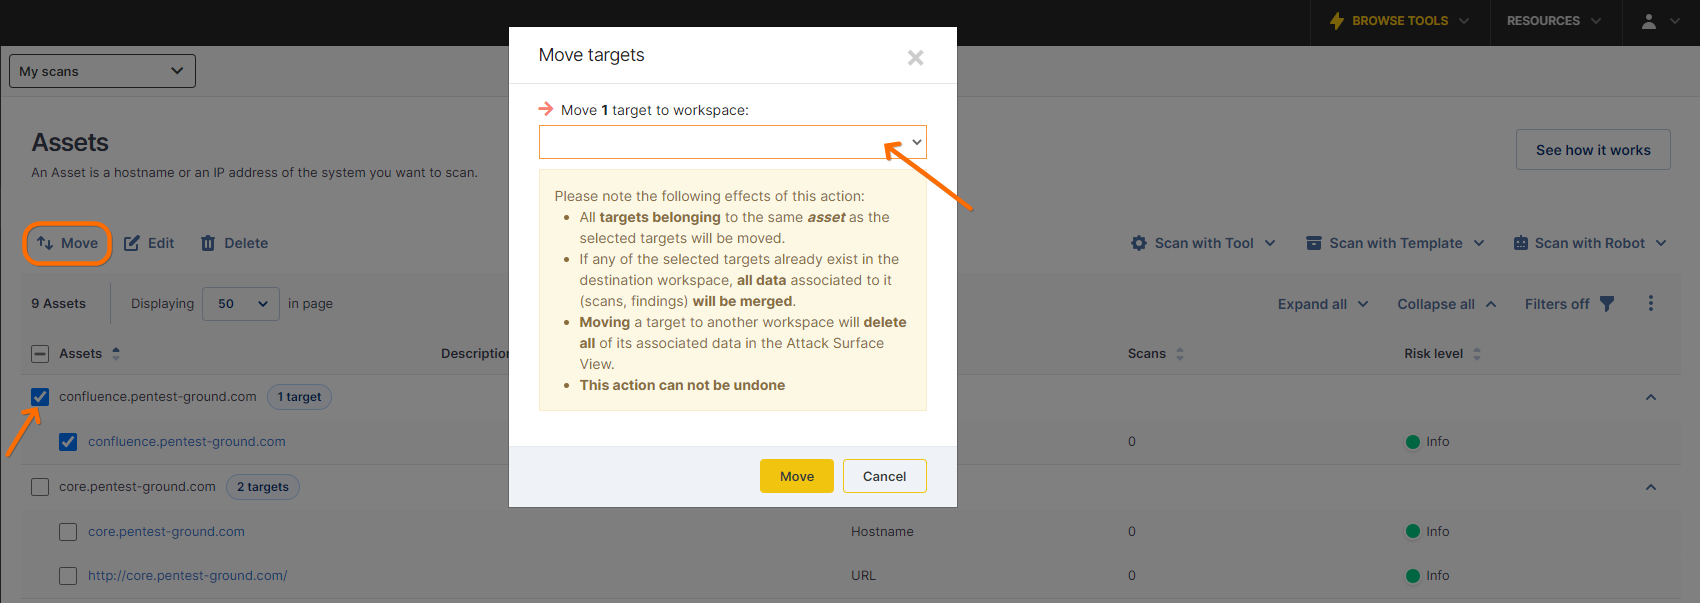
Can I change the name of an asset?
No, you can only Edit the description for a single asset. If you need to change an asset name, you should delete that asset and add a new one with the correct name.