You can perform internal network scanning without performing any special configuration, you just have to run the VPN Agent and start scanning.
Basic ❌ / Advanced ✔️ / Teams ✔️
The VPN Agent is a very small virtual machine (VMware, Hyper-V, VirtualBox) that has to be active in your internal network while the scans are running. The agent does not implement any scanning logic, its only purpose is to ensure secure connectivity (using a VPN tunnel) between your internal systems and our scanning servers.
Since all the scans initiated from our scanning servers will pass through the VPN tunnel you will see the source IP address of the scans as the IP of the VPN Agent.
Step 1: Create a new VPN Profile and download the agent.
Go to VPN Profiles, click on + Add VPN Profile, and select Use VPN agent Virtual Machine (for a custom OpenVPN server, check out this guide).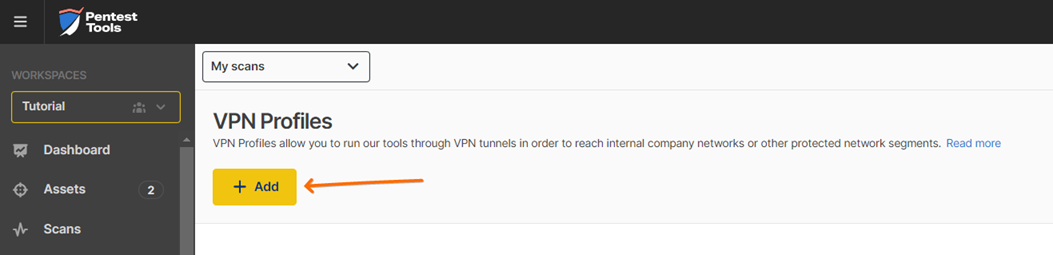
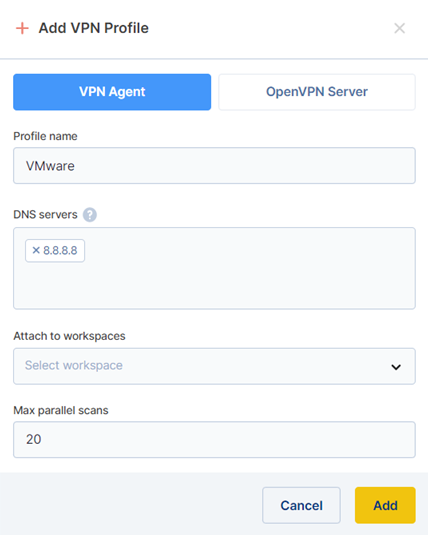
You can either add your internal DNS server or leave the default field.
Attach the new profile to one of your workspaces and click confirm. This step can also be done later, by editing the VPN Profile.
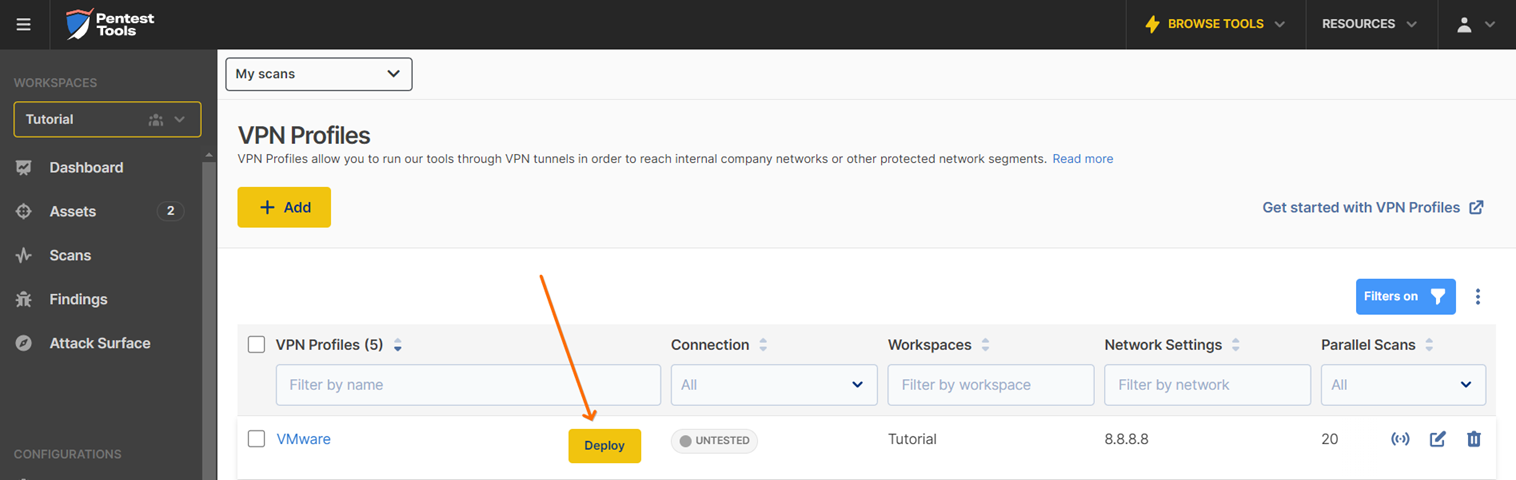
Your new profile will be displayed in the VPN Profiles list. While hovering over the newly created VPN profile, click on the Deploy button and select the preferred deployment method. For this example, we will go with the VMware option.
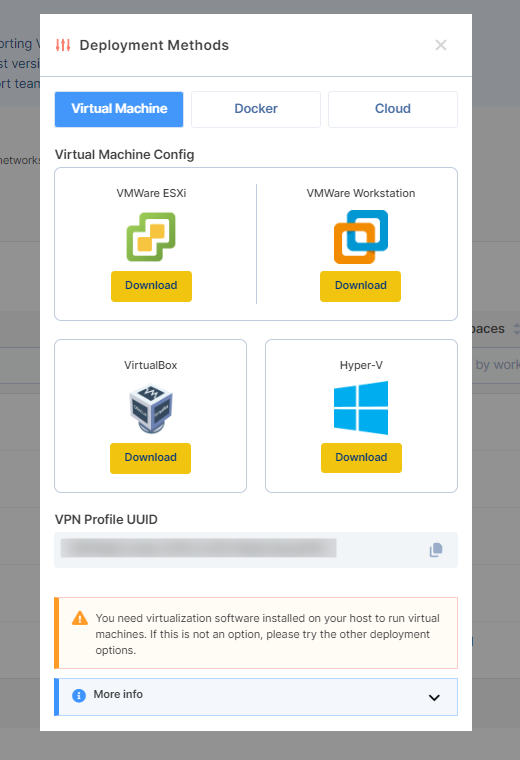
Step 2. Extract the contents of the archive and start the agent
The download should start automatically. Extract the contents of the archive.
Start the virtual machine agent PentestTools-VPN-Agent VMware virtual machine configuration file using VmWare Player or VmWare Workstation. The agent attempts to connect automatically to our infrastructure and you should see an output similar to the following: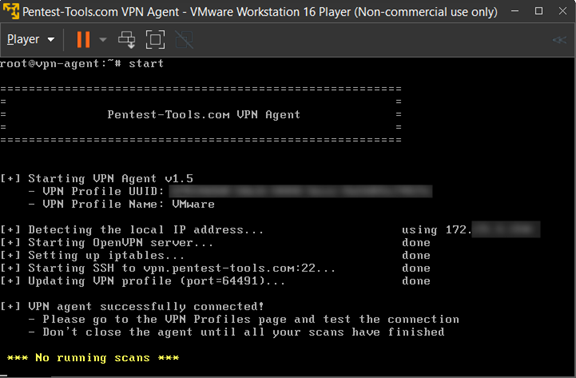
❌ Don’t close the agent until all your scans have finished!
Troubleshooting connection fails
If you’re getting the failed error at the “Detecting the local IP address” step, you need to change from BRIDGE to NAT in the VM settings and restart the agent.
Whitelisting - when using the VPN Agent, you need to make sure that the agent virtual machine is allowed to initiate outbound TCP connections to vpn.pentest-tools.com on port 22. This connection will be used to perform the VPN tunnel between your network and our infrastructure and is the only connection required to perform the internal scanning.
Step 3. Test the connection from the platform
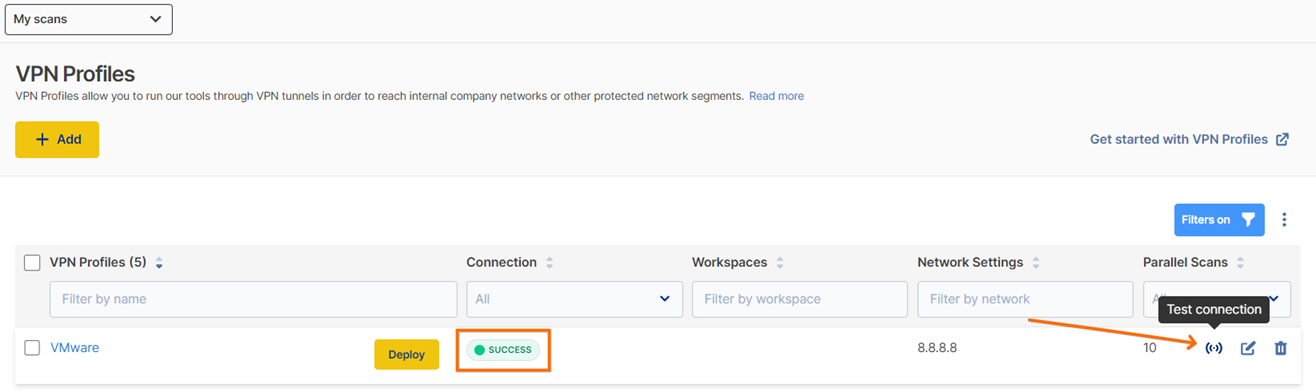
After the agent is successfully connected, you should test the connection from the platform. Go back to the VPN Profiles page and press the “Test connection” button, while hovering with the mouse cursor, over the VPN profile just created. The connection status should change to Success.
Step 4. Start scanning your internal network
At this point, the workspace where you applied the scan profile (Step 1) will be VPN Enabled. You can check that your current workspace uses VPN by the lock icon on the right:
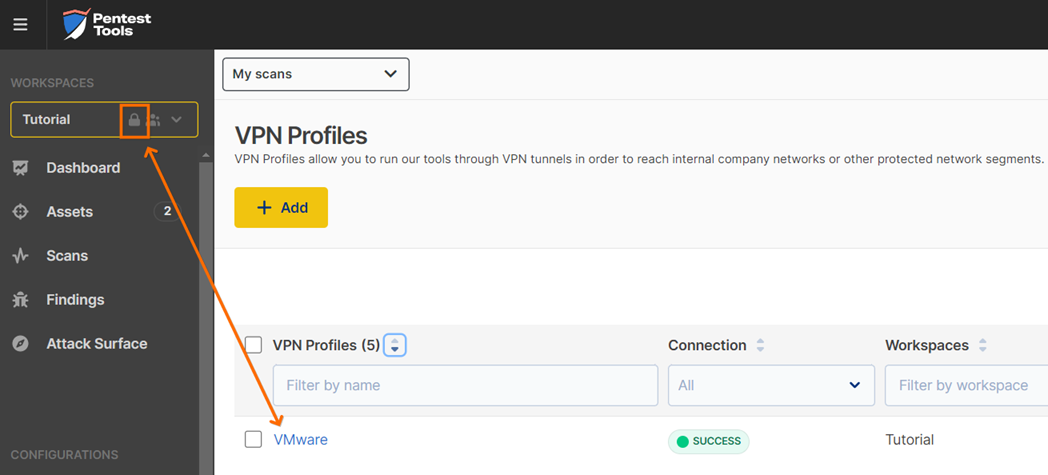
You can now perform scans as you usually do in any workspace. All the traffic will reach your internal network through the VPN Agent virtual machine. Therefore the scanning speed may not be as quick as when you are scanning a publicly exposed system. Even if the scan might seem to stagnate, we recommend you let the scans run.
And don’t forget to keep the VPN agent running for the whole duration of the scans.