With our Team feature, you can easily manage your pentesting and vulnerability assessment workflow with your team.
This feature allows you to:
- See a complete list of team members, granted permissions, wordlists, and other resources that give you an overview of the whole process.
- Give differentiated access to workspaces among team members. You can select No access / View / Edit access for your collaborators.
- You can also change access to other resources to No access / View / Edit.
- Invite team members to your team (here’s how to do it).
In this article, you will find out how to:
- Manage rights between your team members
- Edit shared Workspaces
- Switch between Workspaces
- Collaborate on workspaces with a VPN Profile
- Track actions log for Findings
- Deal with possible errors
1. How to manage rights between your team members
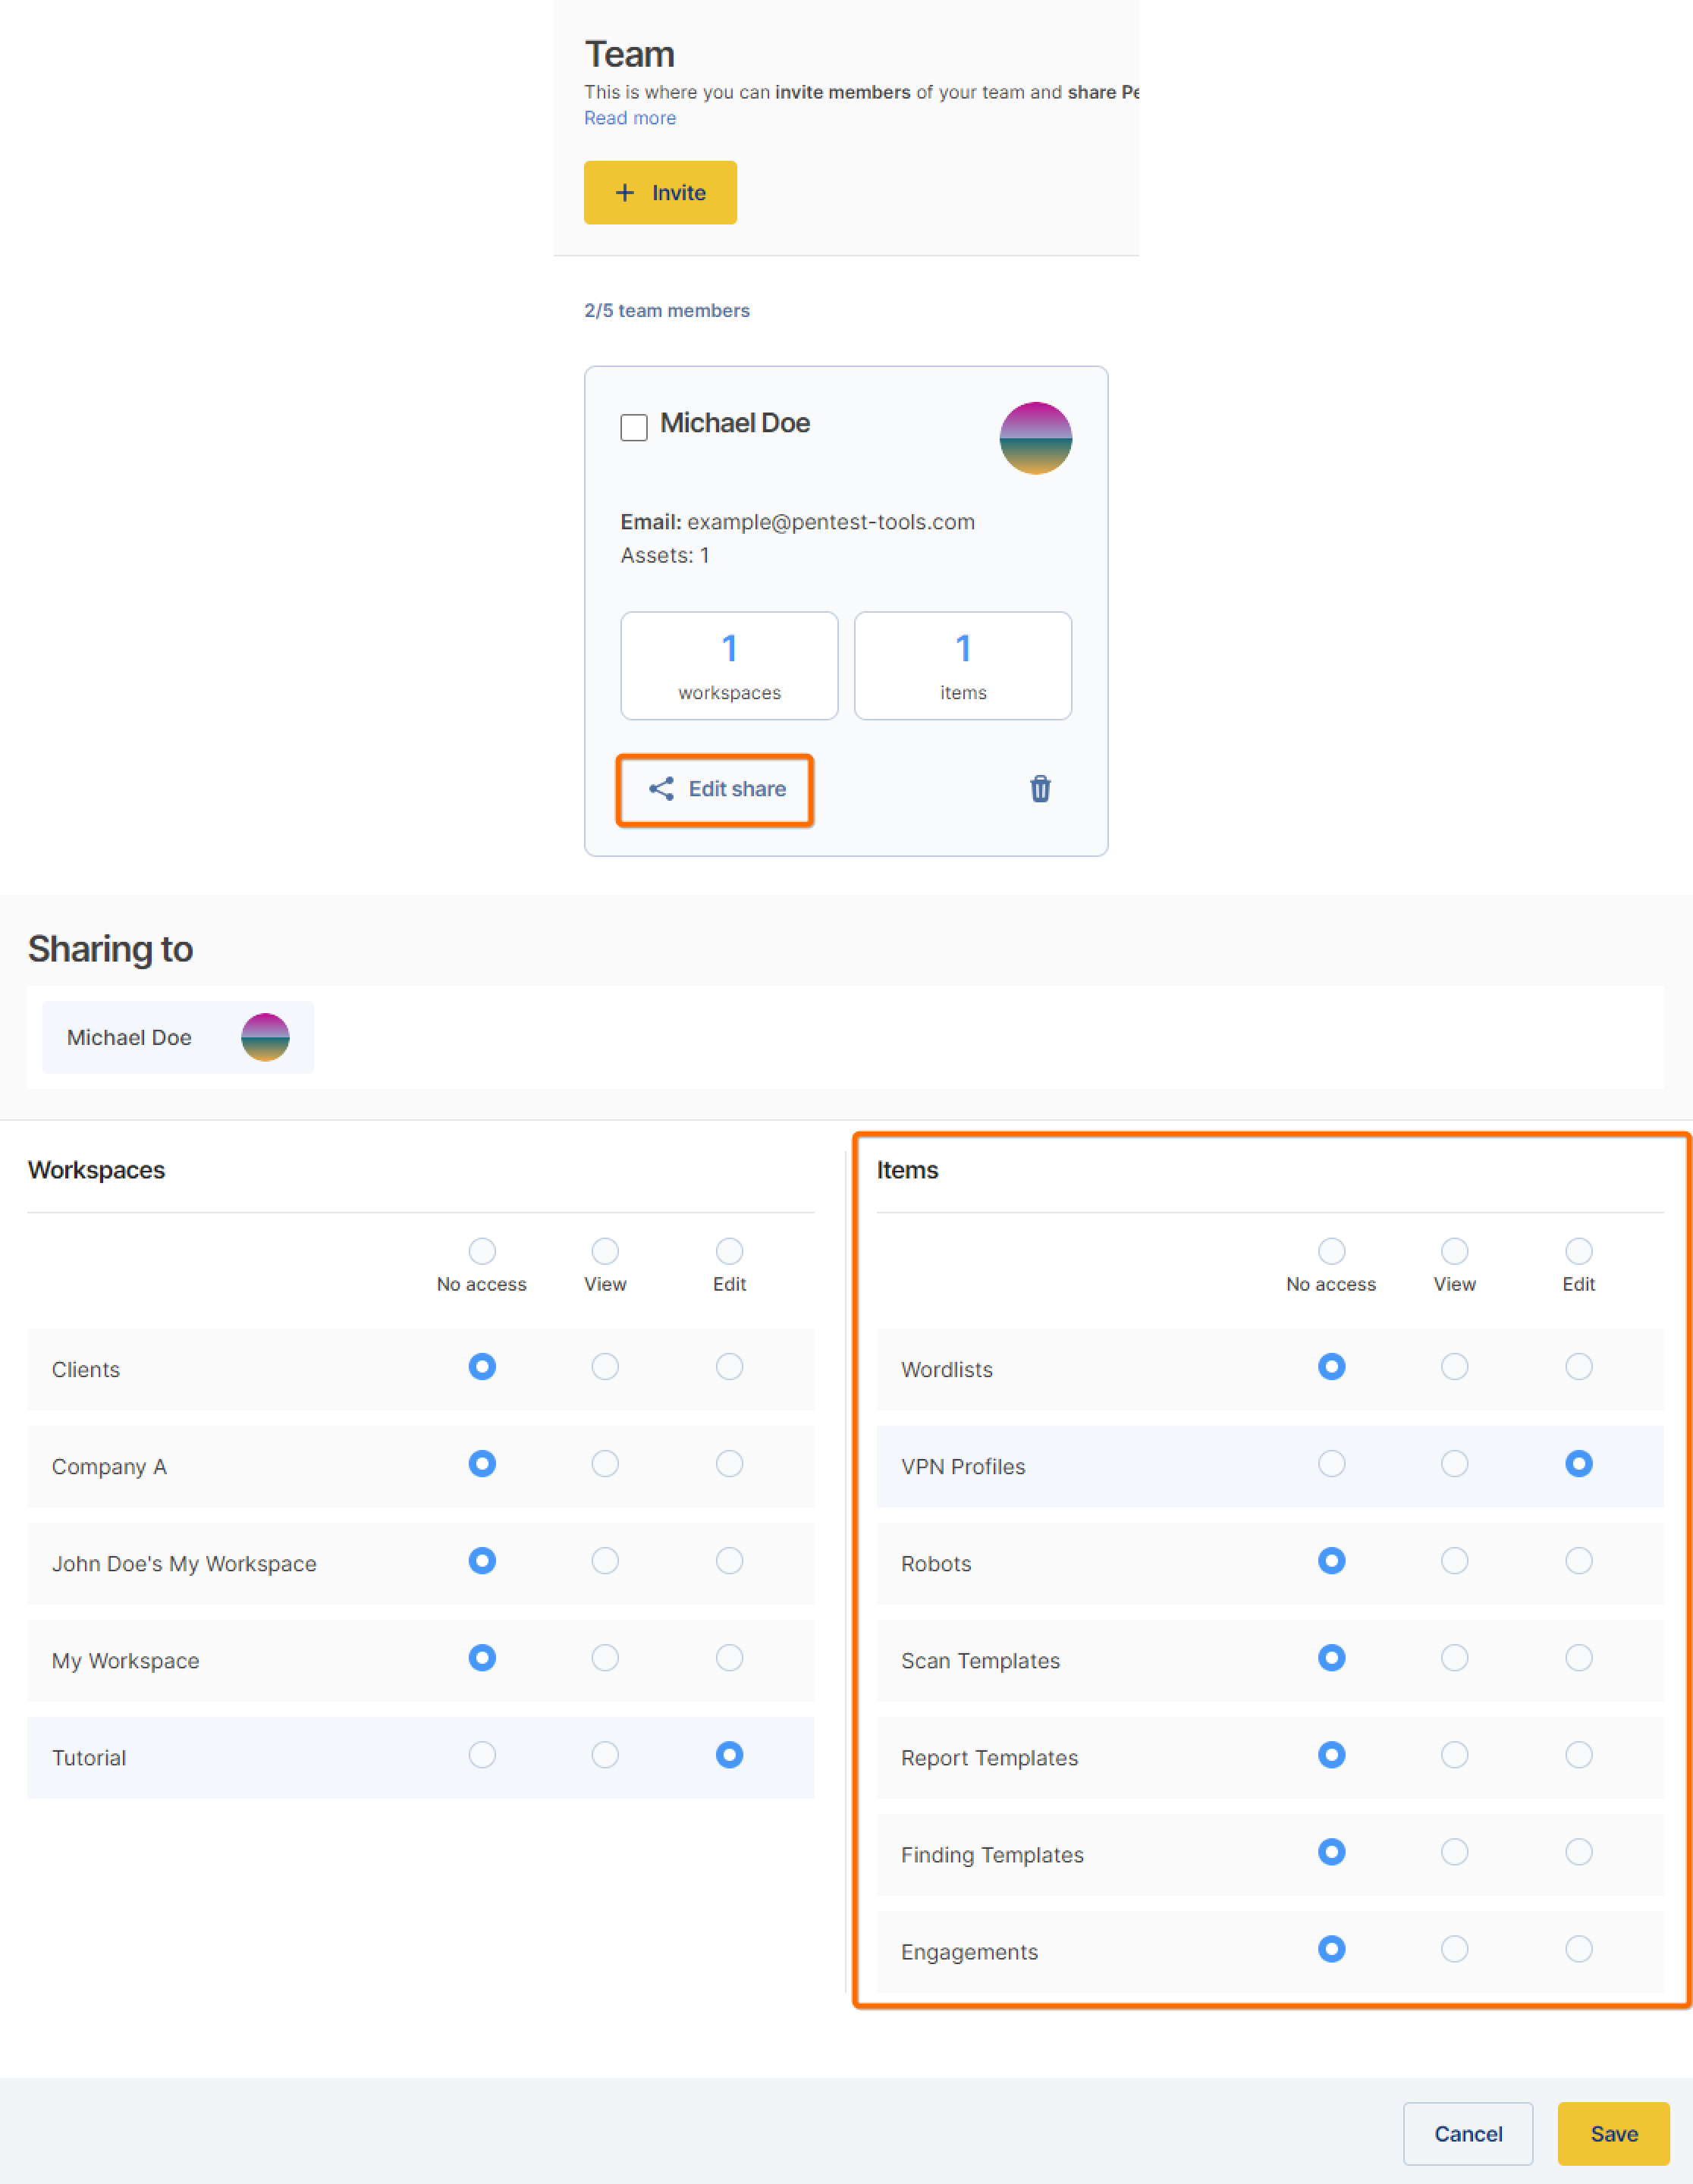
As the account owner, on the /Team tab under Settings, you can see all the team members that you invited to join your team, together with an overview of the current workspaces, and the Items* currently shared with them.
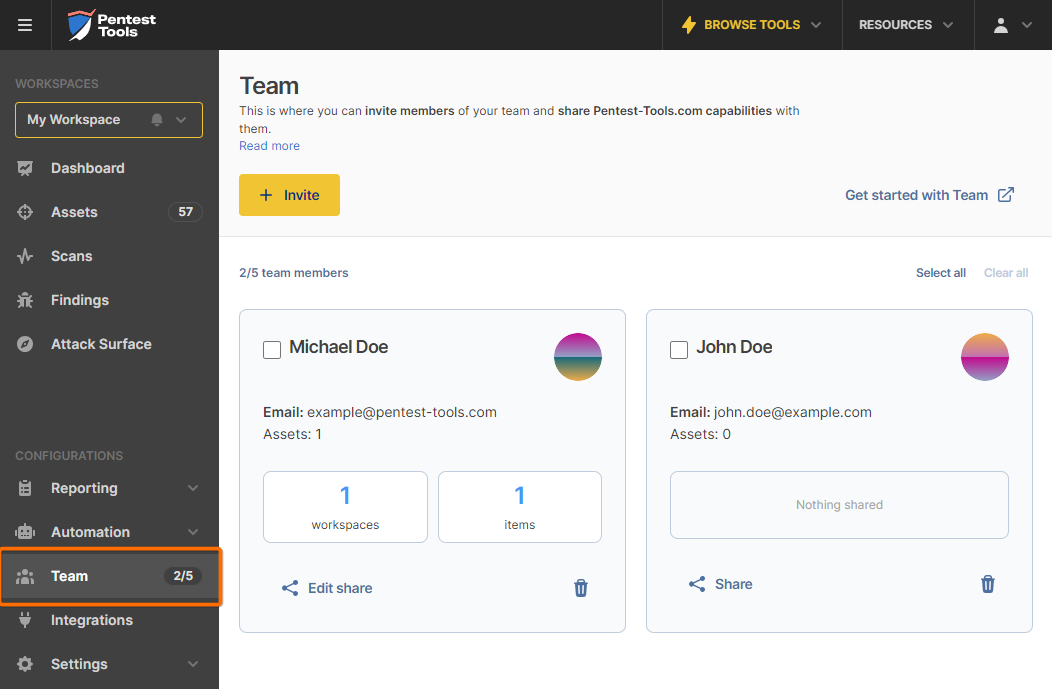
If you click on the “Edit share” button, you can see and edit a user’s access level to a specific Workspace (owned by the user who's doing the sharing). You can do this for one or multiple team members. Invite team members can have the following permissions:
| Read Anything | Export Reports | Edit Scans, Findings, Assets | Modify Findings and Add Manual Findings | Start Scans | |
| No access | ❌ | ❌ | ❌ | ❌ | ❌ |
| View | ✔️ | ✔️ | ❌ | ❌ | ❌ |
| Edit | ✔️ | ✔️ | ✔️ | ✔️ | ✔️ |
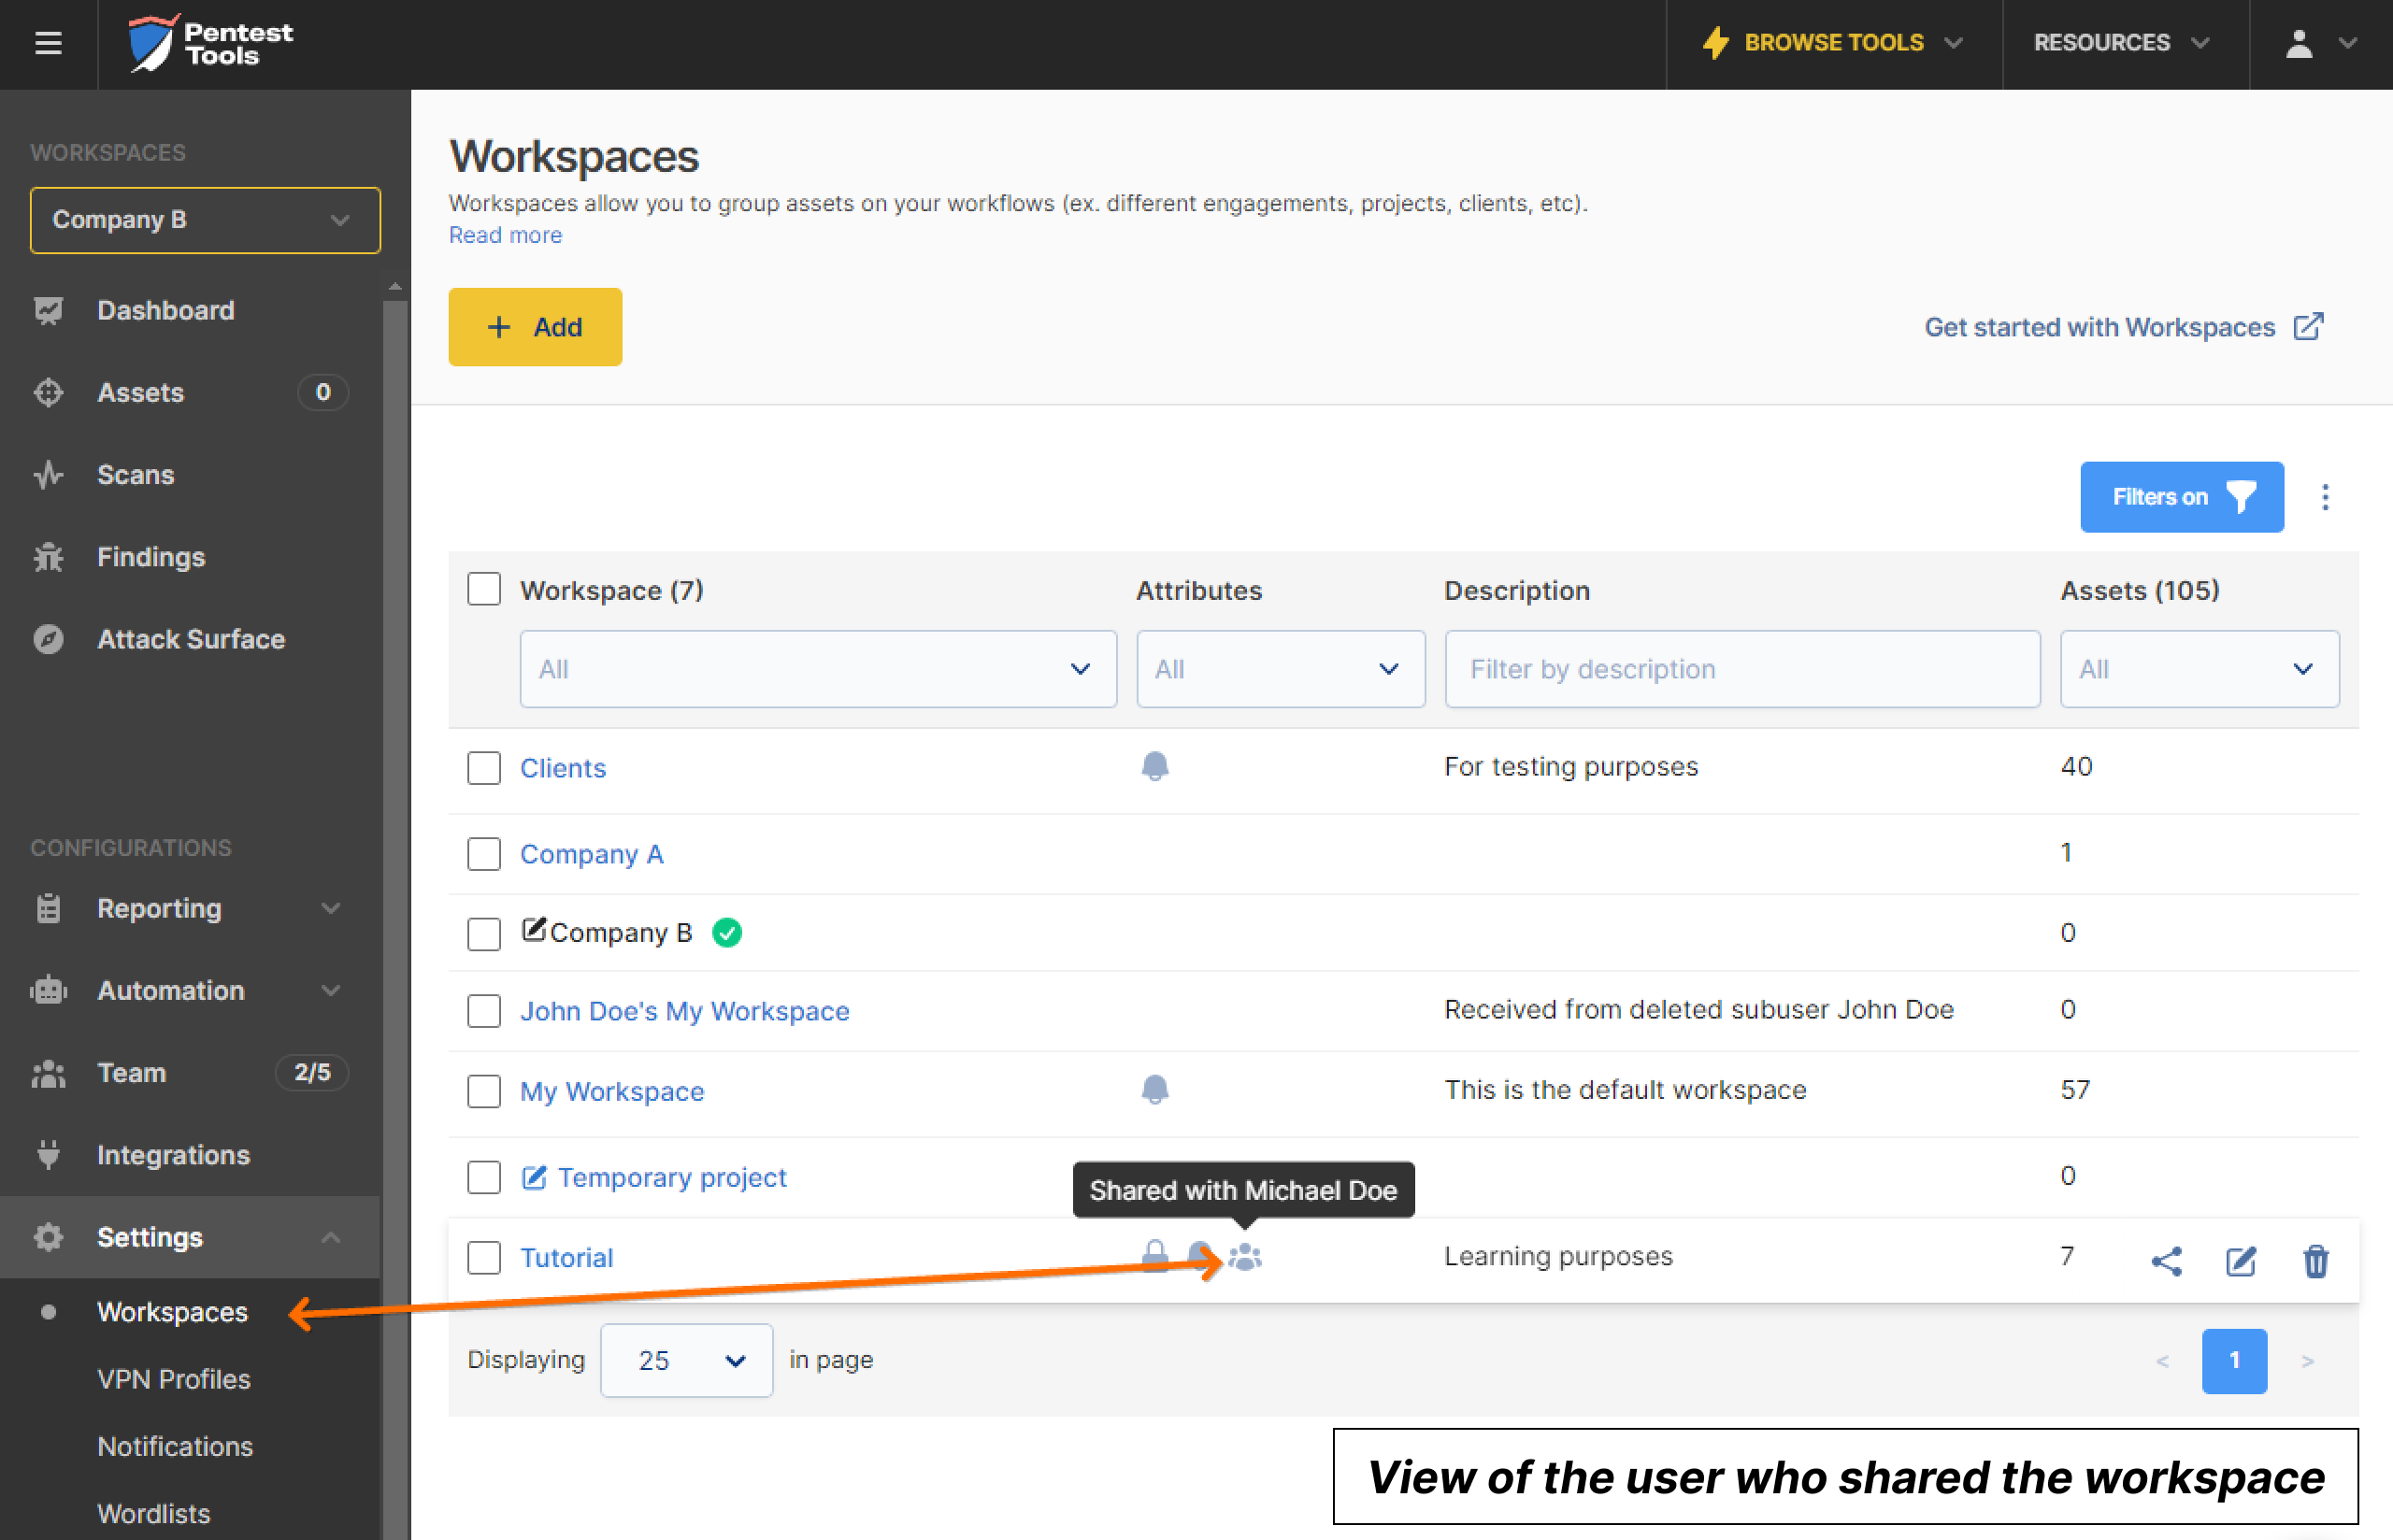
By going to the /Workspaces page, you can see the team members with which you shared the workspace, by hovering over the icon shown below:
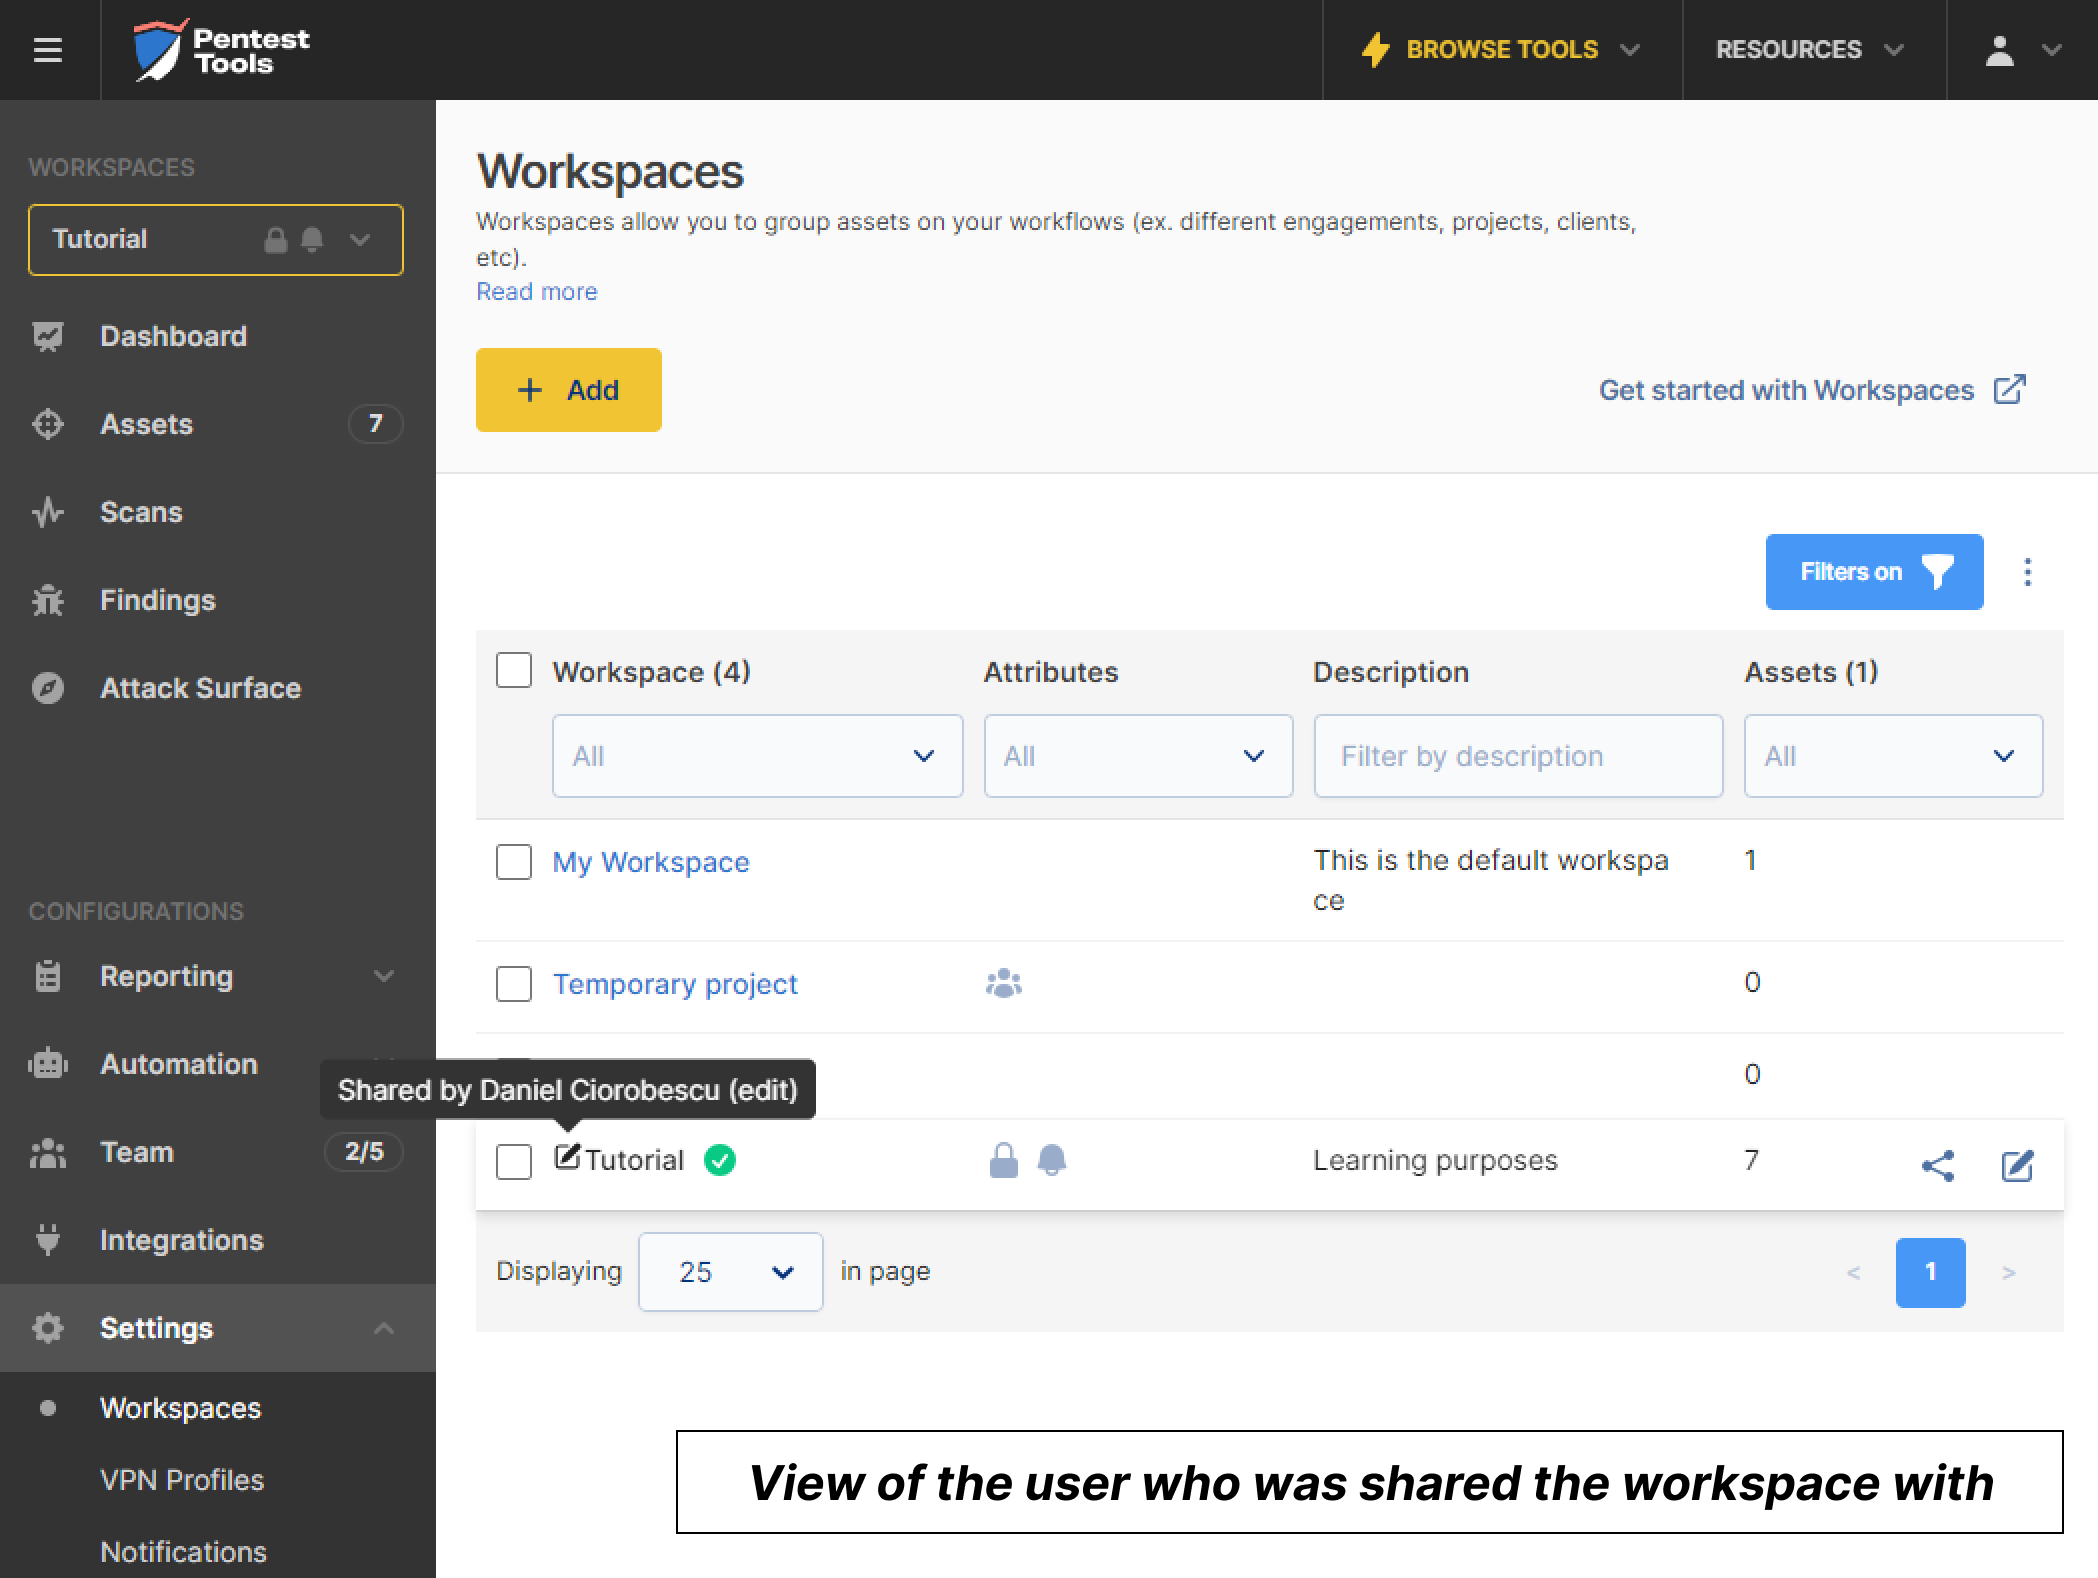
And this is what the Workspaces page looks like from another team member’s account. As you can see, they have an overview of all their workspaces, both the ones they created and the ones shared with them. They can’t see a team member’s Workspace if the Workspace owner didn’t give them access to it.
To see your changes implemented, you need to refresh the page.
For more advanced settings, such as managing permissions over Items, use the Edit share option from the /Team page for your chosen user.

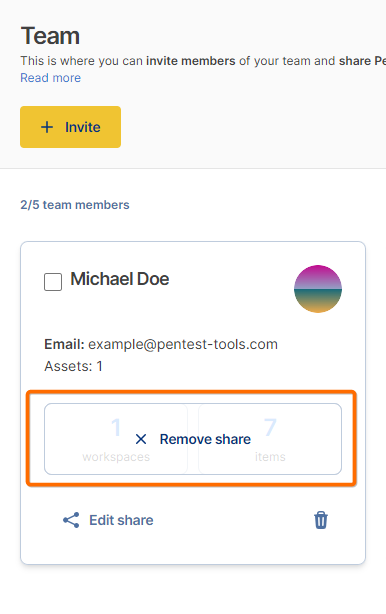
If you want to remove all rights for one or multiple users, select the option “No access” to the Workspaces to which you wish to remove access, or simply click on the Remove Share option that appears on hovering over the user in the /Team page. This will remove all access to the workspaces and Items shared with them.
2. How to edit your Workspaces
You can edit all the workspaces you created or to which you gave other team members Edit access, except for “My Workspace”, which no other users cannot edit besides its owner – even when shared with Edit privileges.
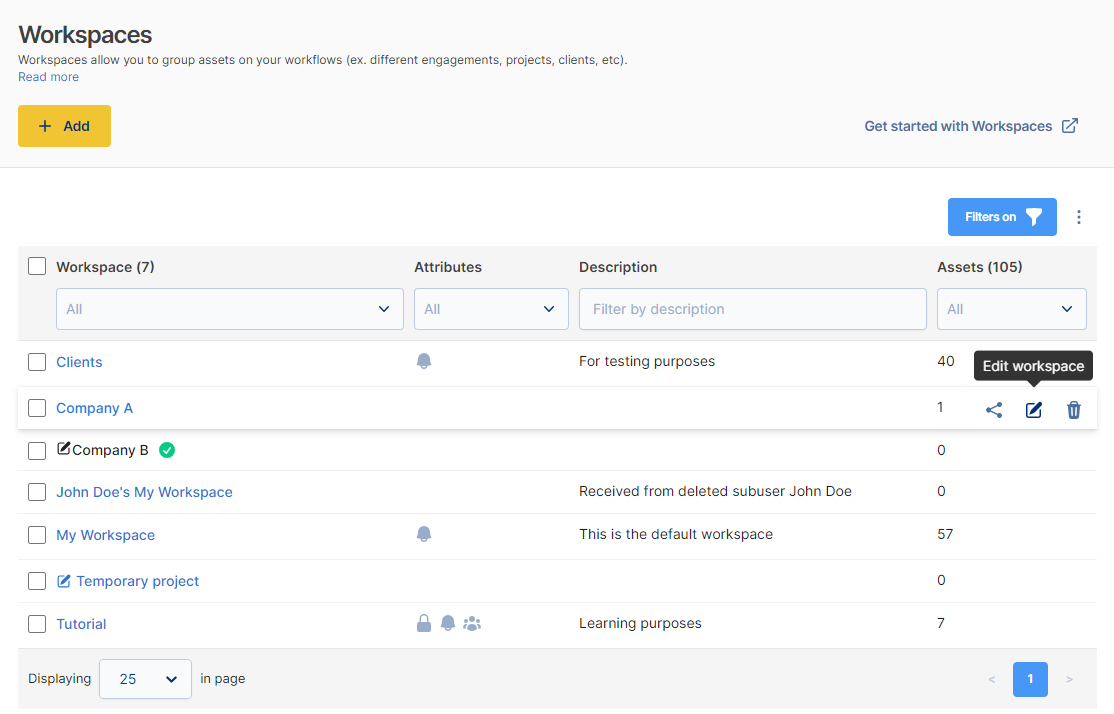
You can do this by clicking on the Edit workspace button.
Delete: You can delete all the workspaces you own, except for “My Workspace”. You cannot delete other users’ Workspaces, no matter the level of access.
You can do this by clicking on the Delete workspace button that appears while hovering over the Workspace you intend to delete.

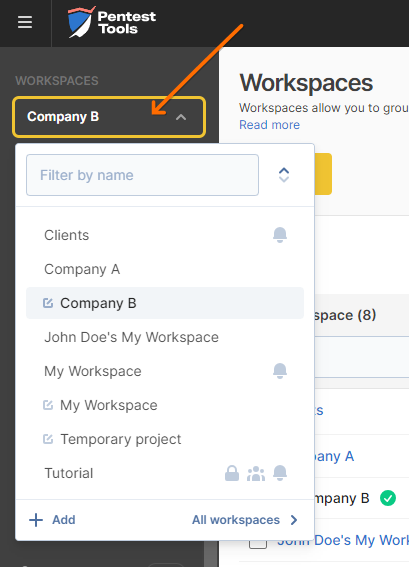
3. How to switch between Workspaces
You can change the current Workspace from the dropdown menu pinned to the top left corner of the page. All the scans you perform and the generated findings belong to this Workspace.
However, you can move assets (and their associated findings) between workspaces.
4. How to collaborate on Workspaces with a VPN Profile
Providing access to a Workspace doesn’t automatically give the user access to the VPN Profile.
You must give them specific access to the VPN Profile from the user's Edit Share section on your /Team page, as shown here.
To find out more about scanning internal networks using the VPN Agent, please refer to our support article.
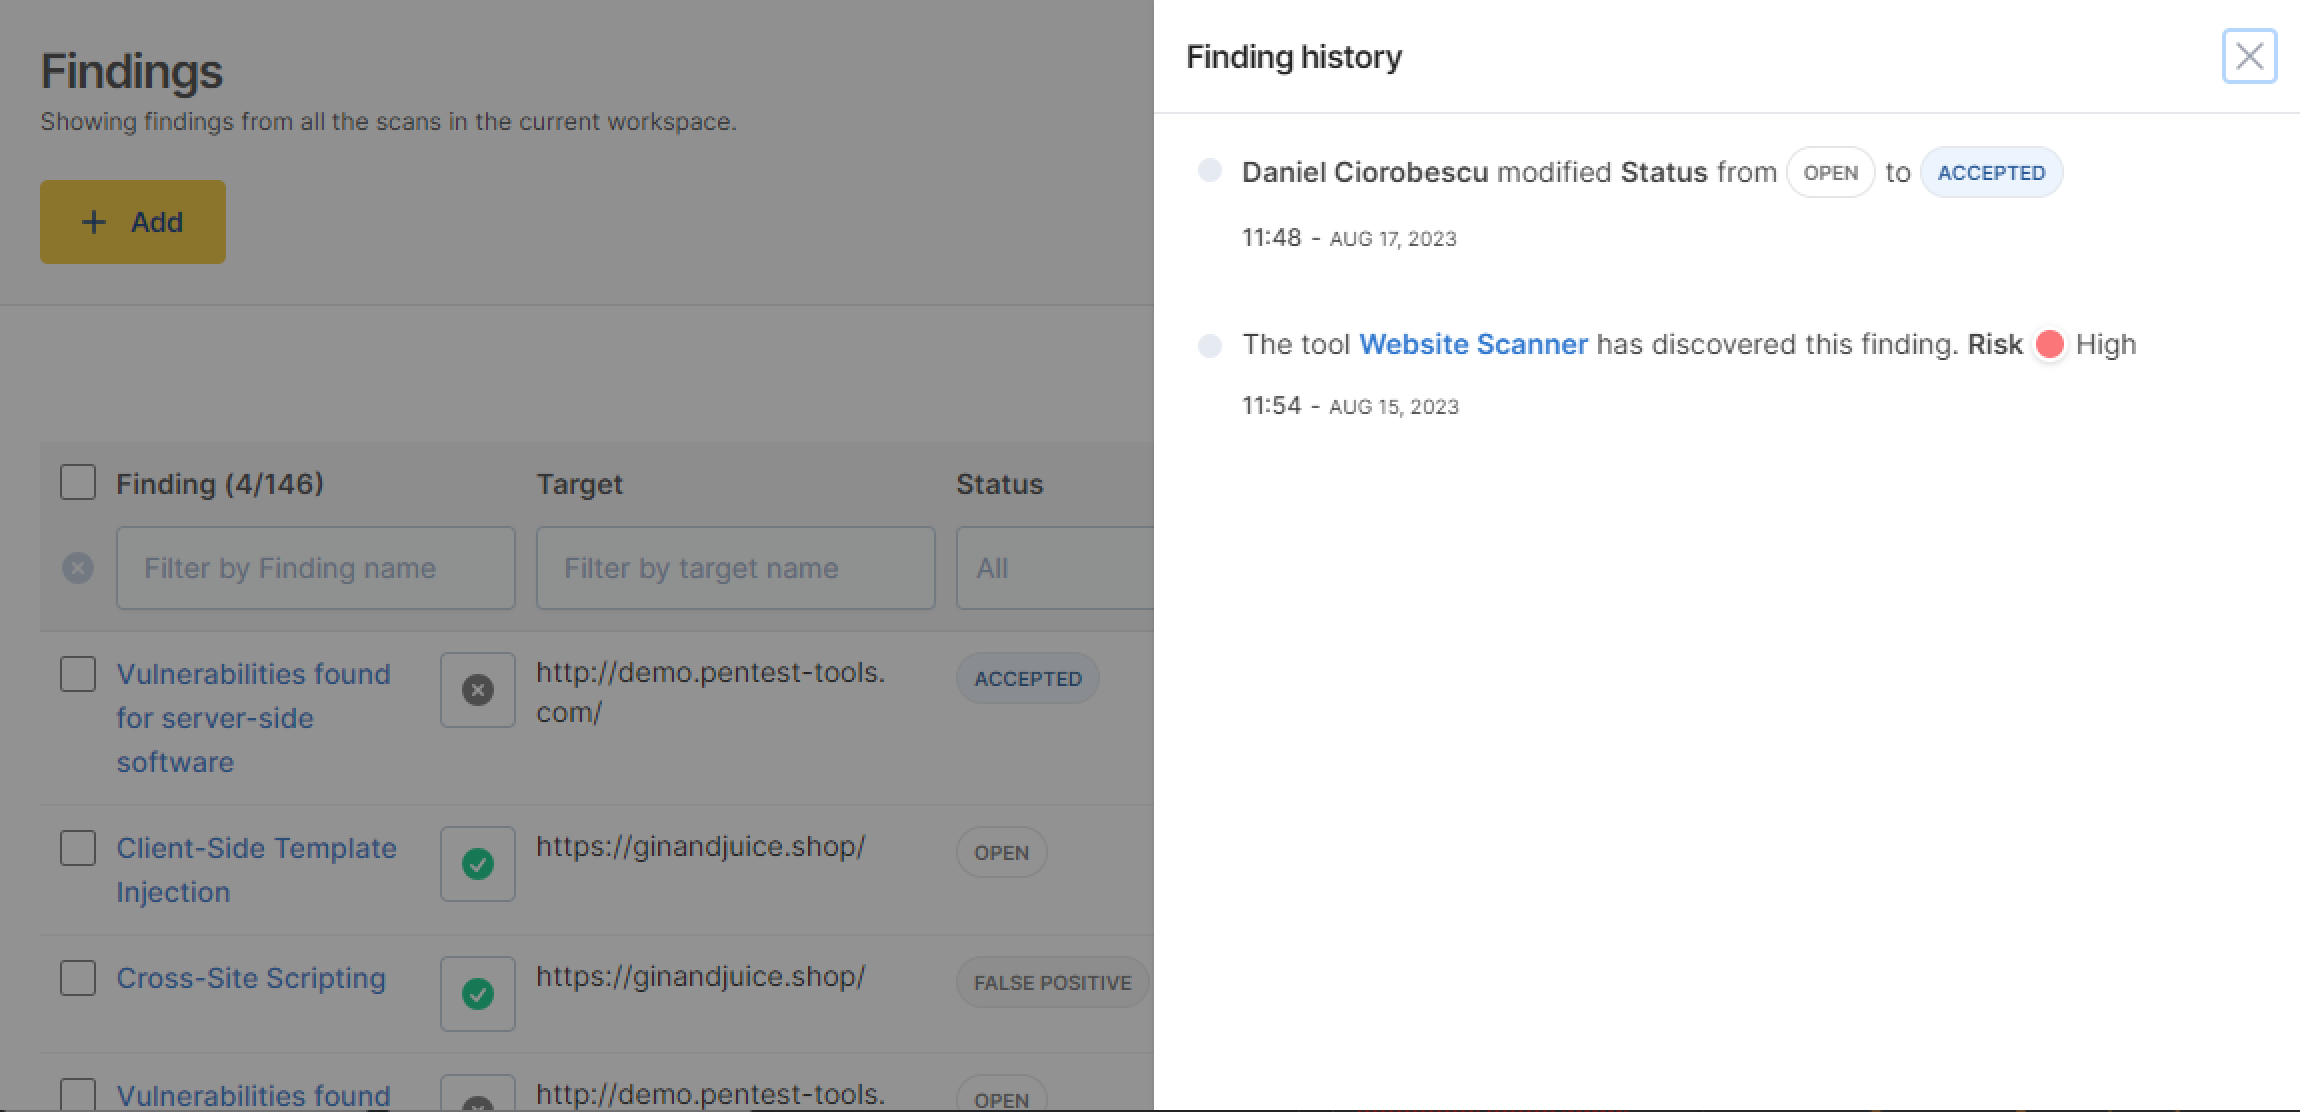
5. How to track actions logs for Findings
In the /Findings tab, you can see the changes each user made to a finding by clicking the Findings History button, which appears while hovering over the finding.
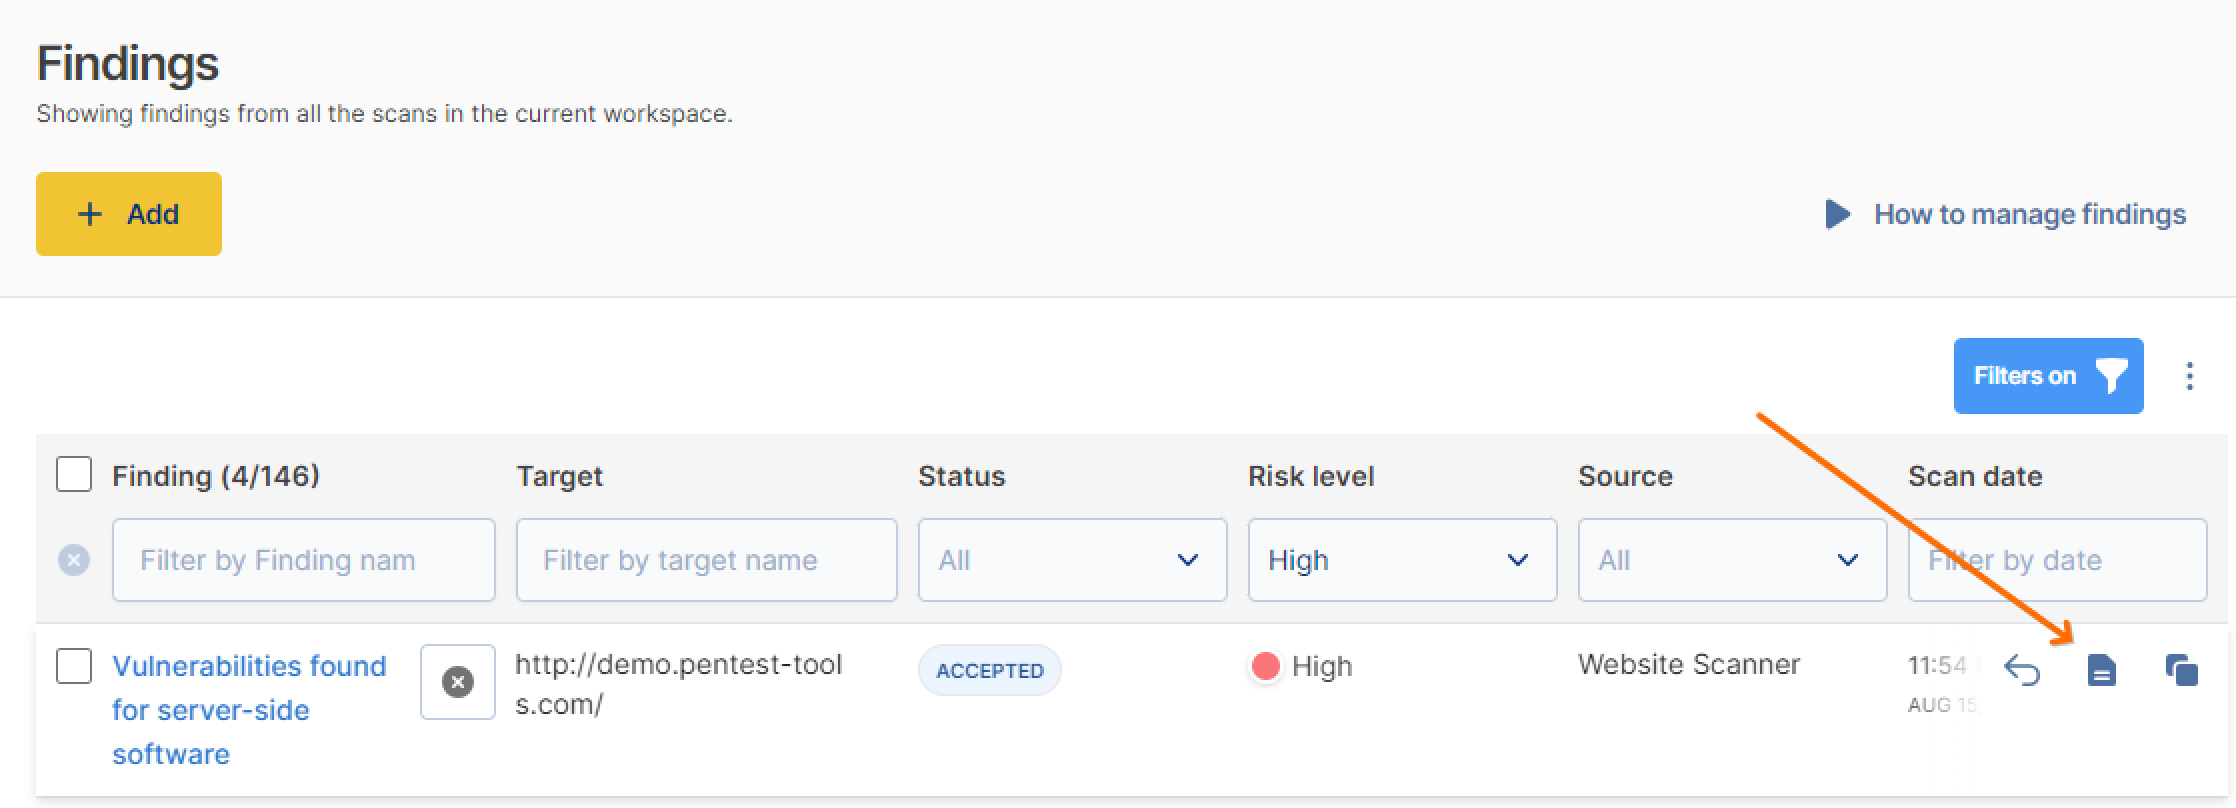
This helps you keep track of changes you and your team members make.

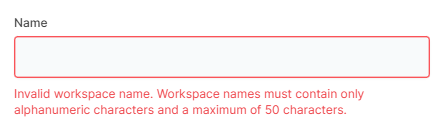
6. Possible errors
- Invalid Workspace name. You can’t add special characters to your Workspace’s name.