Looking for vulnerabilities in your web application? Let Website Scanner do that for you! In this article, we explain all the features and options available to help you make the finest vulnerability reports.
The Website Vulnerability Scanner is a custom tool written by our team which helps you quickly assess the security of a web application. It is a full-blown web application scanner, capable of performing comprehensive security assessments against any type of web application.
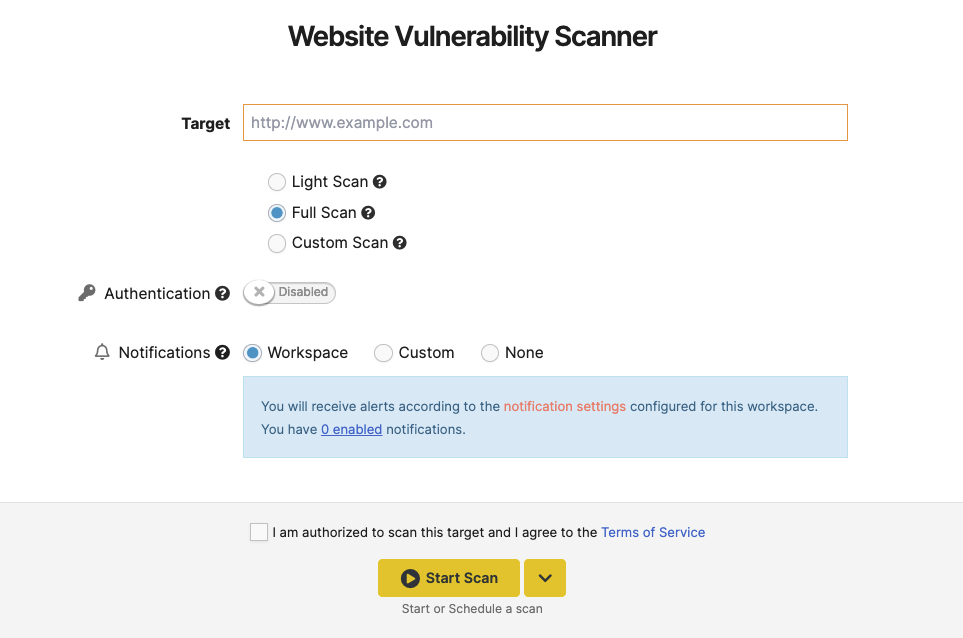
Light Scan
This option gives a brief overview of the website. The report will contain website technologies that can be found and vulnerabilities that can be found within a few minutes.
Full Scan
This is the default option when trying to start the scan. This type of scan can run up to 24 hours and will search for OWASP Top 10 vulnerabilities.
This has all the options enabled by default, except for Resource Discovery.
We recommend you do not change the default settings. However, if you have any specific requirements, such as a very large application, or you need to exclude several parts of the application from the scan, you can configure these settings as described below, with a Custom Scan.
Custom Scan
This part of the interface enables you to enforce the scanner to:
- run only specific checks, such as SQL or XSS Injection testing, or scan for only a type of vulnerability
- limit the number of requests per second/depth of the scan
- exclude critical URLs
and many, many others.
⚠️ When using scheduled scans with custom scan options, newly added detectors will not be enabled by default, you will need to use the Full Scan option to have all the new features of the scanner in scheduled scans.
Initial tests
These tests are recommended for all applications. You can skip any of these, depending on the target application typology. The scan duration will vary depending on the number and the complexity of the tests you select to perform.
The resource discovery part is the most time-consuming, so we recommend you run this test at a later stage, or when you have time to leave the scan running.
You can schedule a scan for later using the scheduling feature. For more details, please check out our support article on how to schedule a scan.
Read more about each test in the dedicated article
Engine Options
You can configure the following options to determine how deep you want the scan to crawl the application or set some paths that you want the scanner to avoid.
Approach
The Approach section notifies the scanner of which type of spidering method to use.
- Classic Spider – Used to crawl classic websites.
- SPA Spider– Used to crawl single-page application (JavaScript-heavy) websites. We are still working on this feature and it will be released in a later version.
Limits
By adjusting the Spidering depth you are letting the scanner know the number of subpaths (‘/’) it should crawl and scan, meaning to what extent the search engine indexes the website’s content.
A greater crawl depth might get a lot more injection points than a site with a lower crawl depth, but it will also affect your scan duration. We recommend that you keep the default value.
You can also decrease the number of requests per second that the scanner sends to the target website.
Excluded URLs
Excluded URLs are a list of URL test names to ignore when scanning. By default, this is an empty list representing no paths that should be excluded. You can enter each URL on a new line. Make sure to enter the full path of the URL(s).
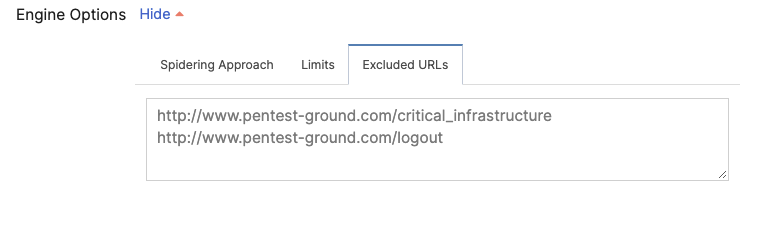
Tip: You can resize the input box by dragging the bottom-right corner.
Attack Options
Attack Options represent tests the scanner engine is performing on every new Injection Point it detects during the scanning process. An Injection Point is a target URL paired with unique parameters. It is considered validated after the scanner sends a request to it and checks if the response is valid.
For example “https://www.example.com/?parameter=value” is a unique Injection Point that is checked with all the selected modules.
There are Active and Passive checks. Both types of tests use the validated Injection Points from the request engine.
The difference between them is that active checks send a large number of requests against an Injection Point with specific payloads that should trigger certain behaviors from the target that indicate whether it is vulnerable or not.
The latter use the Injection Points detected directly, therefore passive checks are not sending additional requests. They analyze the server’s response for specific configurations and behaviors that prove the target is vulnerable to different attacks
⚠️ While the passive checks generate a maximum of 20 HTTP requests to the server, the active checks are more aggressive and send up to 10,000 HTTP requests. This may trigger alarms from IDS but you should know that it is not a destructive scan.
Authentication
If your application requires authentication to access certain parts of the website, it is highly recommended to enable authenticated scanning. Thus, the scanner covers more application functionality and pages than the unauthenticated scan.
If you wish to learn more about why you should perform an authenticated scan, you can check out this dedicated article from our Learning Center.
The “Check authentication” button is optional for the first three methods and disabled for the “Headers” method, so you can start scanning directly.
Our Website Vulnerability Scanner supports four methods for performing authenticated scans:
- Recorded – Recording-based Authentication
- Automatic – Form-based authentication
- Cookies – Cookie-based authentication
- Headers – Headers authentication
You’ll know that the authentication was successful if you get an additional “Authentication complete” message in the final scan report. Furthermore, the Spider results should contain more crawled URLs than the unauthenticated scan.
Notifications
You can configure notifications when your scan matches certain conditions (is Finished, found High Risk, discovered some open port, etc).