Learn how easy it is to deploy the AWS VPN Agent in any AWS Cloud Infrastructure so our scanners can reach your Cloud Infrastructure securely, by using an encrypted VPN Tunnel.
At Pentest-Tools.com, we focus on making your workflow smoother, so you can move fast on the platform and save time for other priority tasks.
That’s why we've created the AWS VPN Agent that can be easily deployed in any AWS Cloud Infrastructure. This way, our scanners can reach your Cloud Infrastructure securely, by using an encrypted VPN Tunnel
How to deploy AWS Agent in your network
Step 1: Create a new VPN Profile
Go to VPN Profiles, click on + Add VPN Profile, and select Use VPN agent to configure it. If you need more options to scan your internal networks using VPN, check out our dedicated articles.
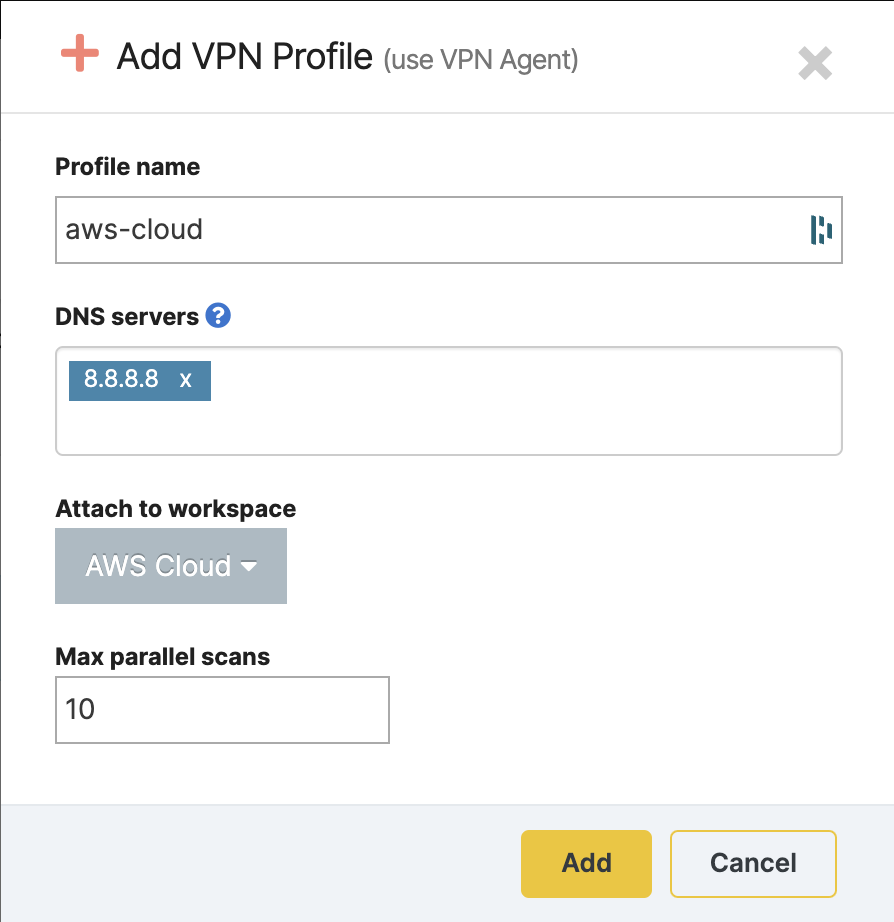
You can either add your internal DNS server or set the default value.
Attach the new profile to one of your workspaces and click Add. It will be displayed in the VPN Profiles list.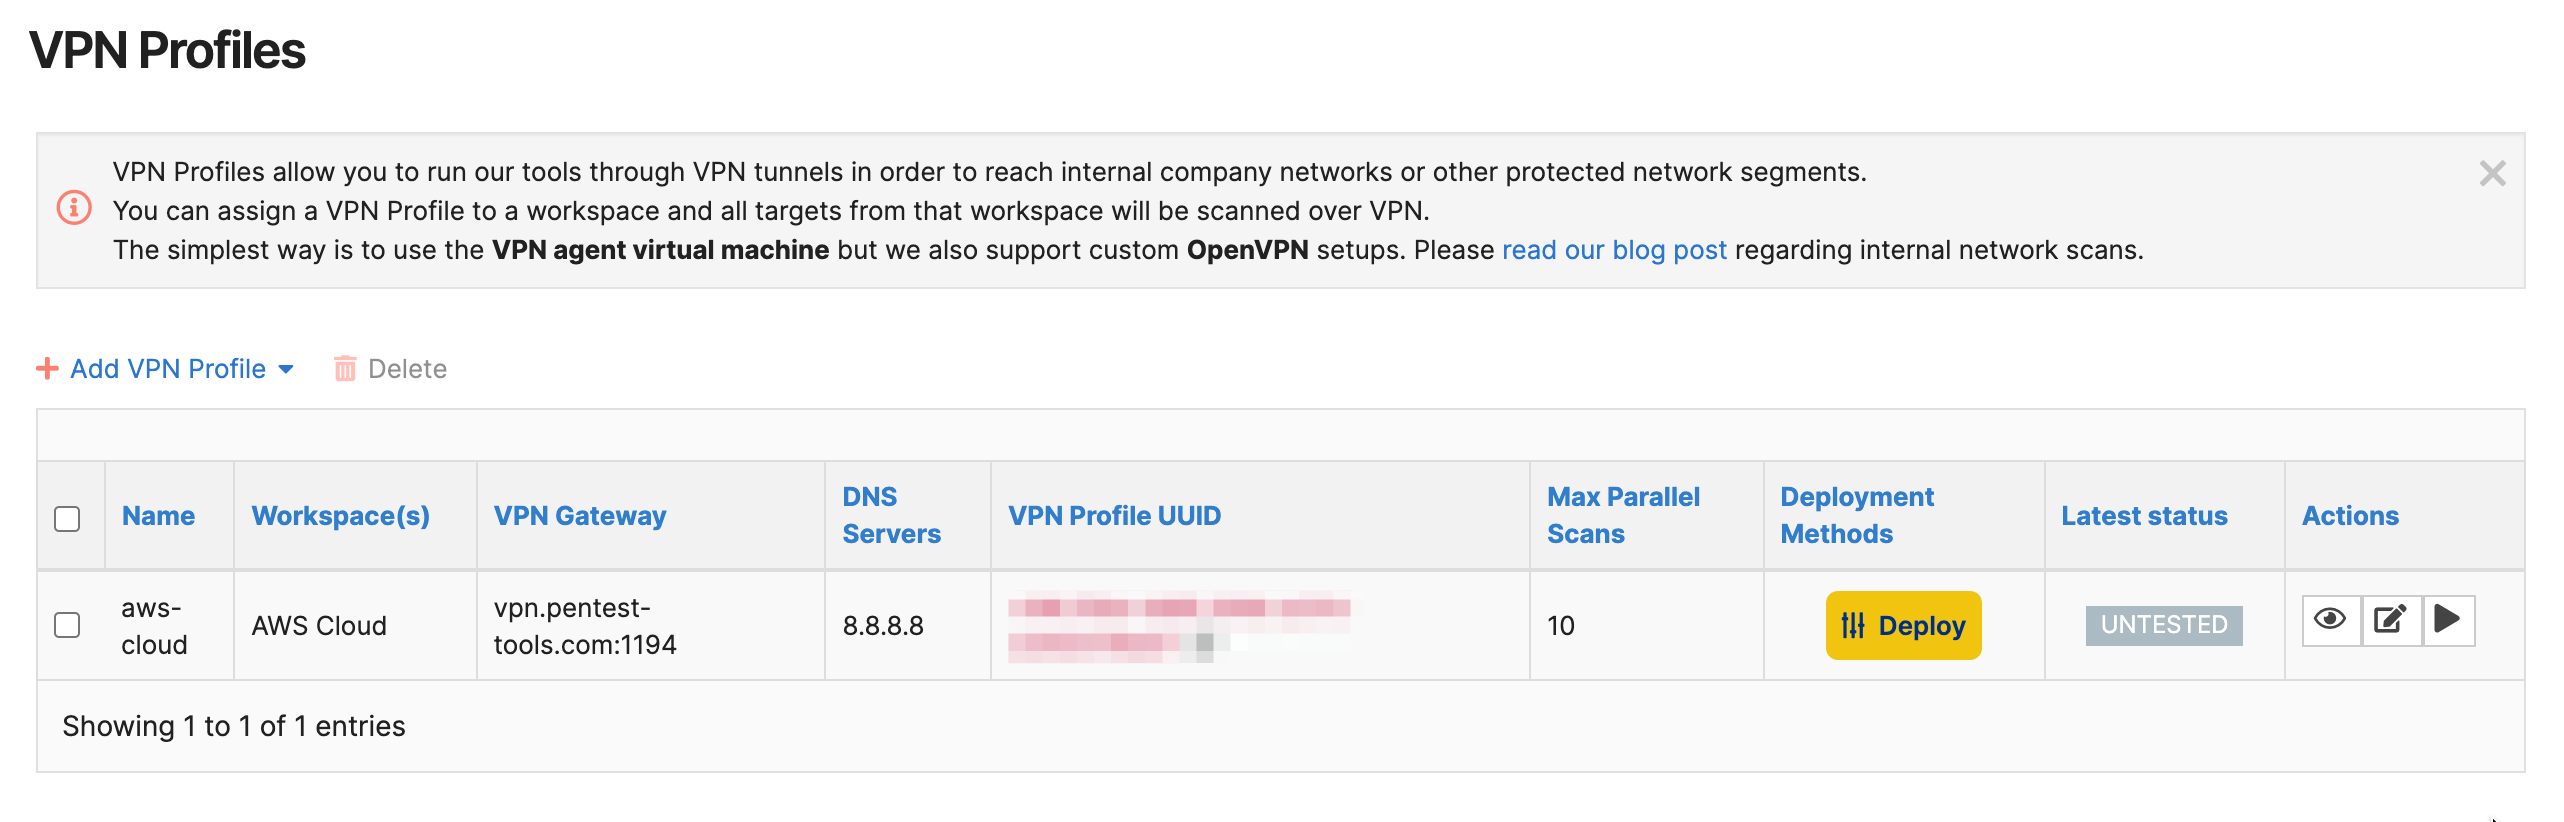
Click on the yellow button Deploy.
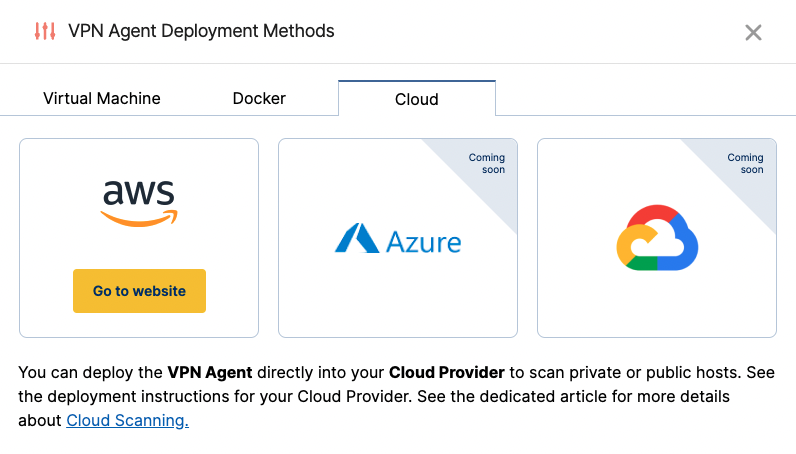
Go to the Cloud tab and click Go to website from AWS.
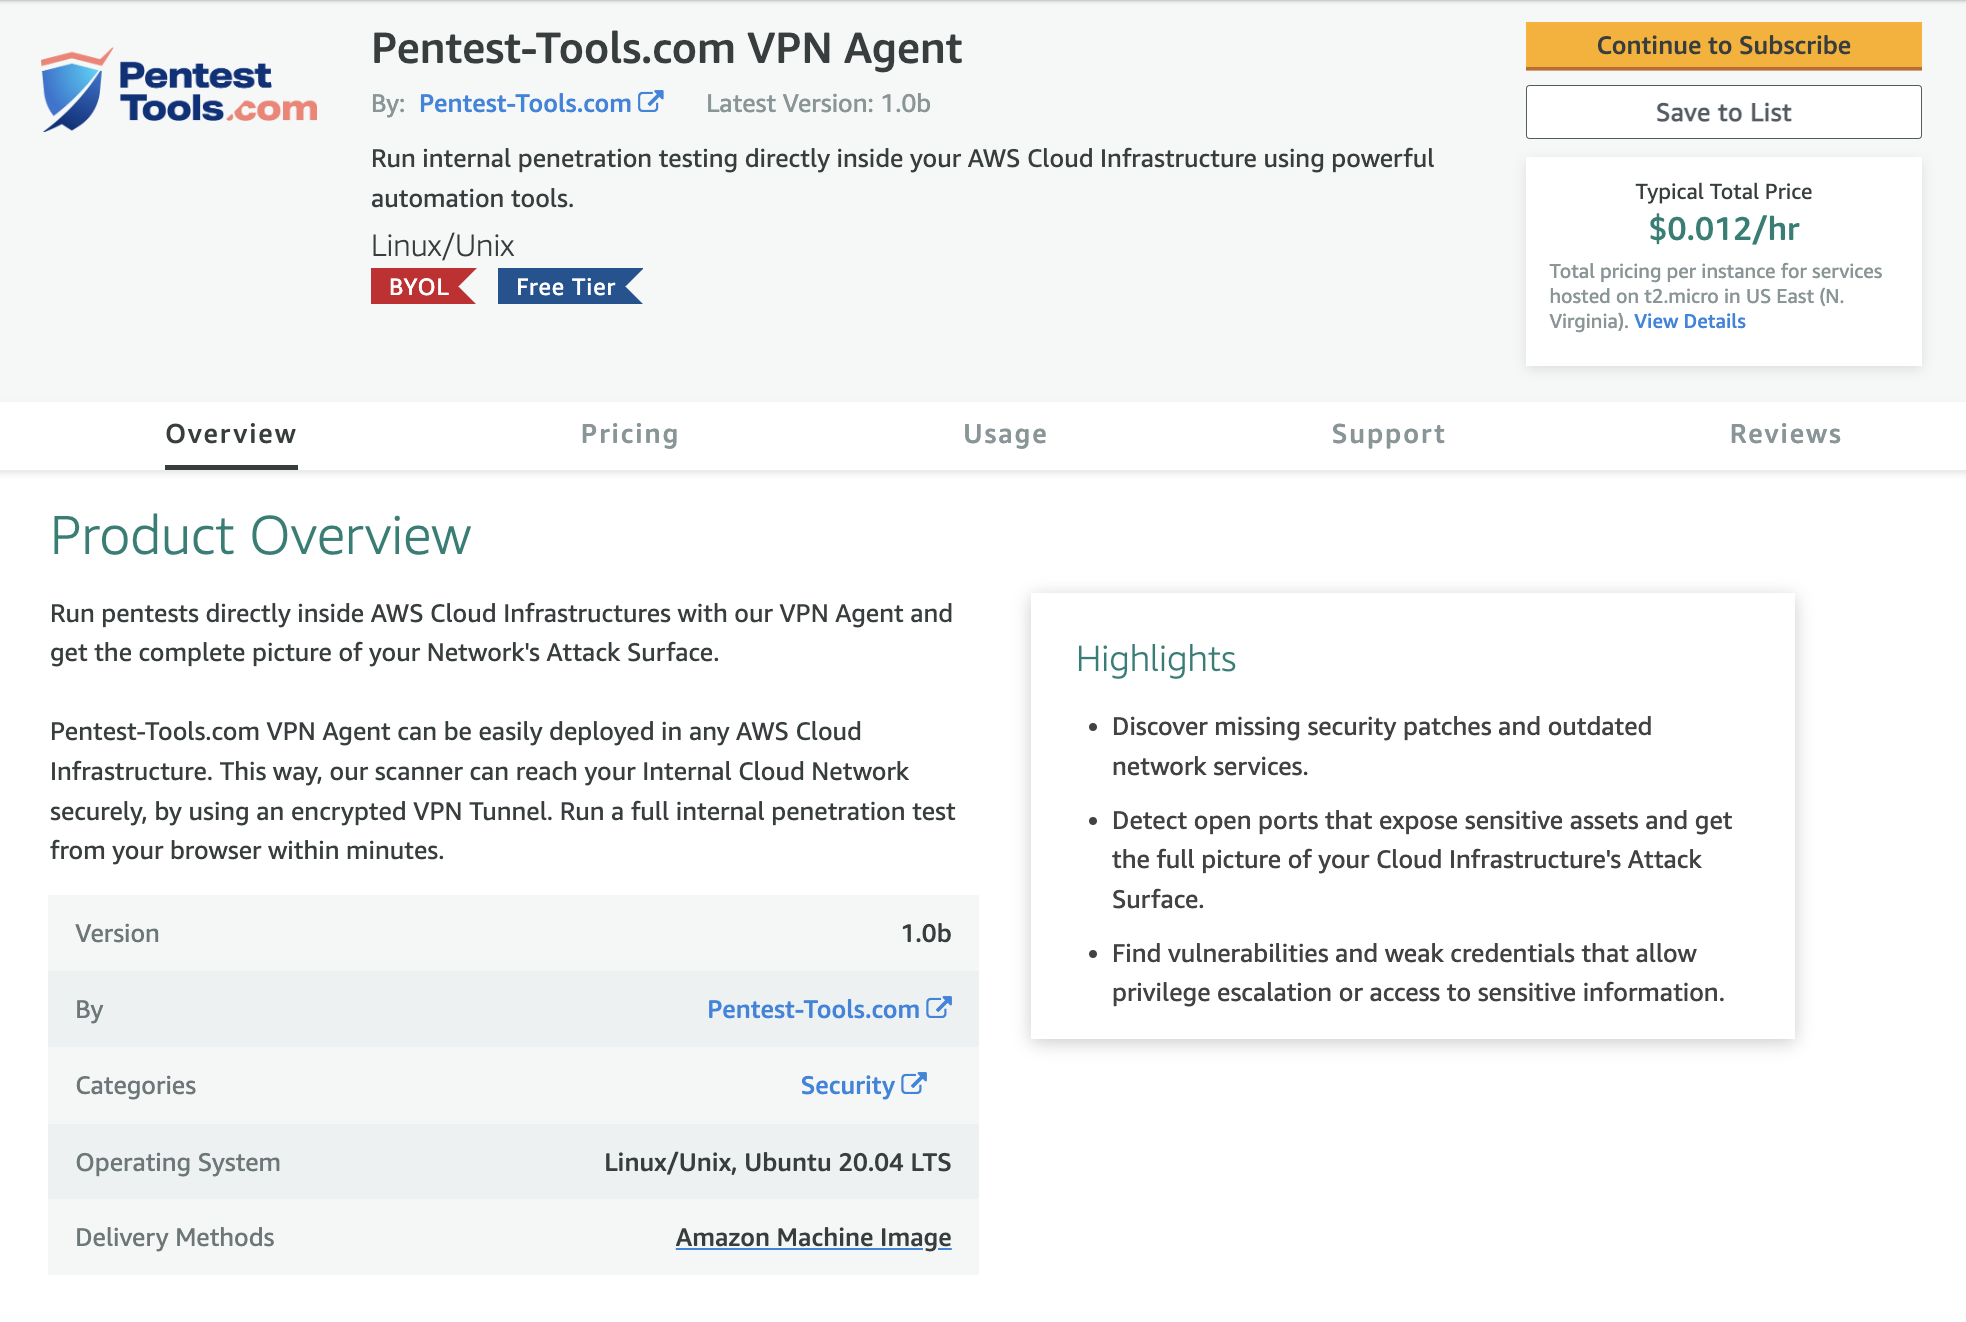
Step 2: Launch the EC2 Agent
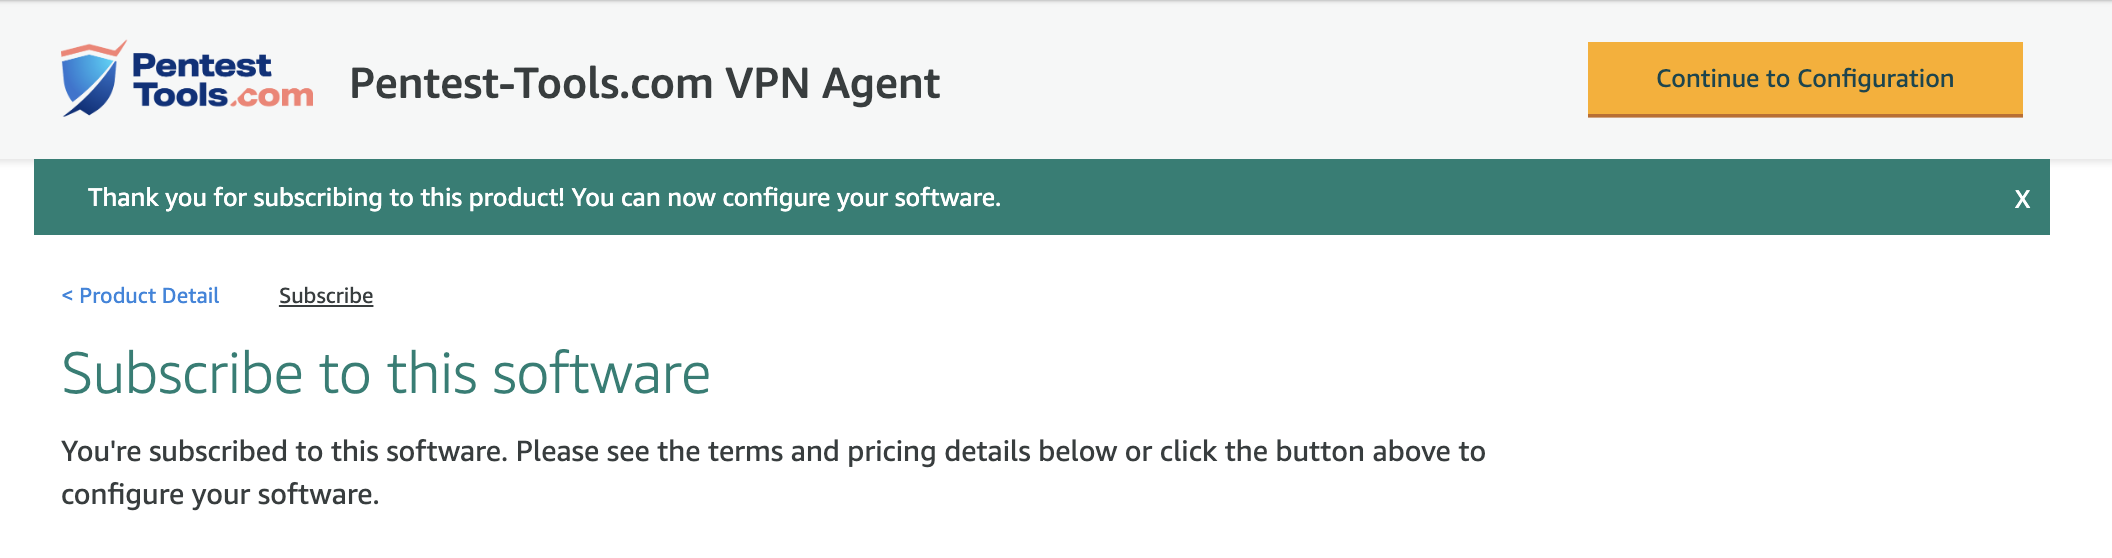
Click Continue to Subscribe and follow the subscription steps from there.
You won't be charged for using the Pentest-Tools.com VPN Agent on AWS, but you require an active license on Pentest-Tools.com to make use of this service.
It might take a few minutes to process the subscription request.
After the subscription is completed, the button from the upper right corner will turn yellow Continue to Configuration.
Please make sure you have selected that latest version of the Agent and then click Continue to Launch.
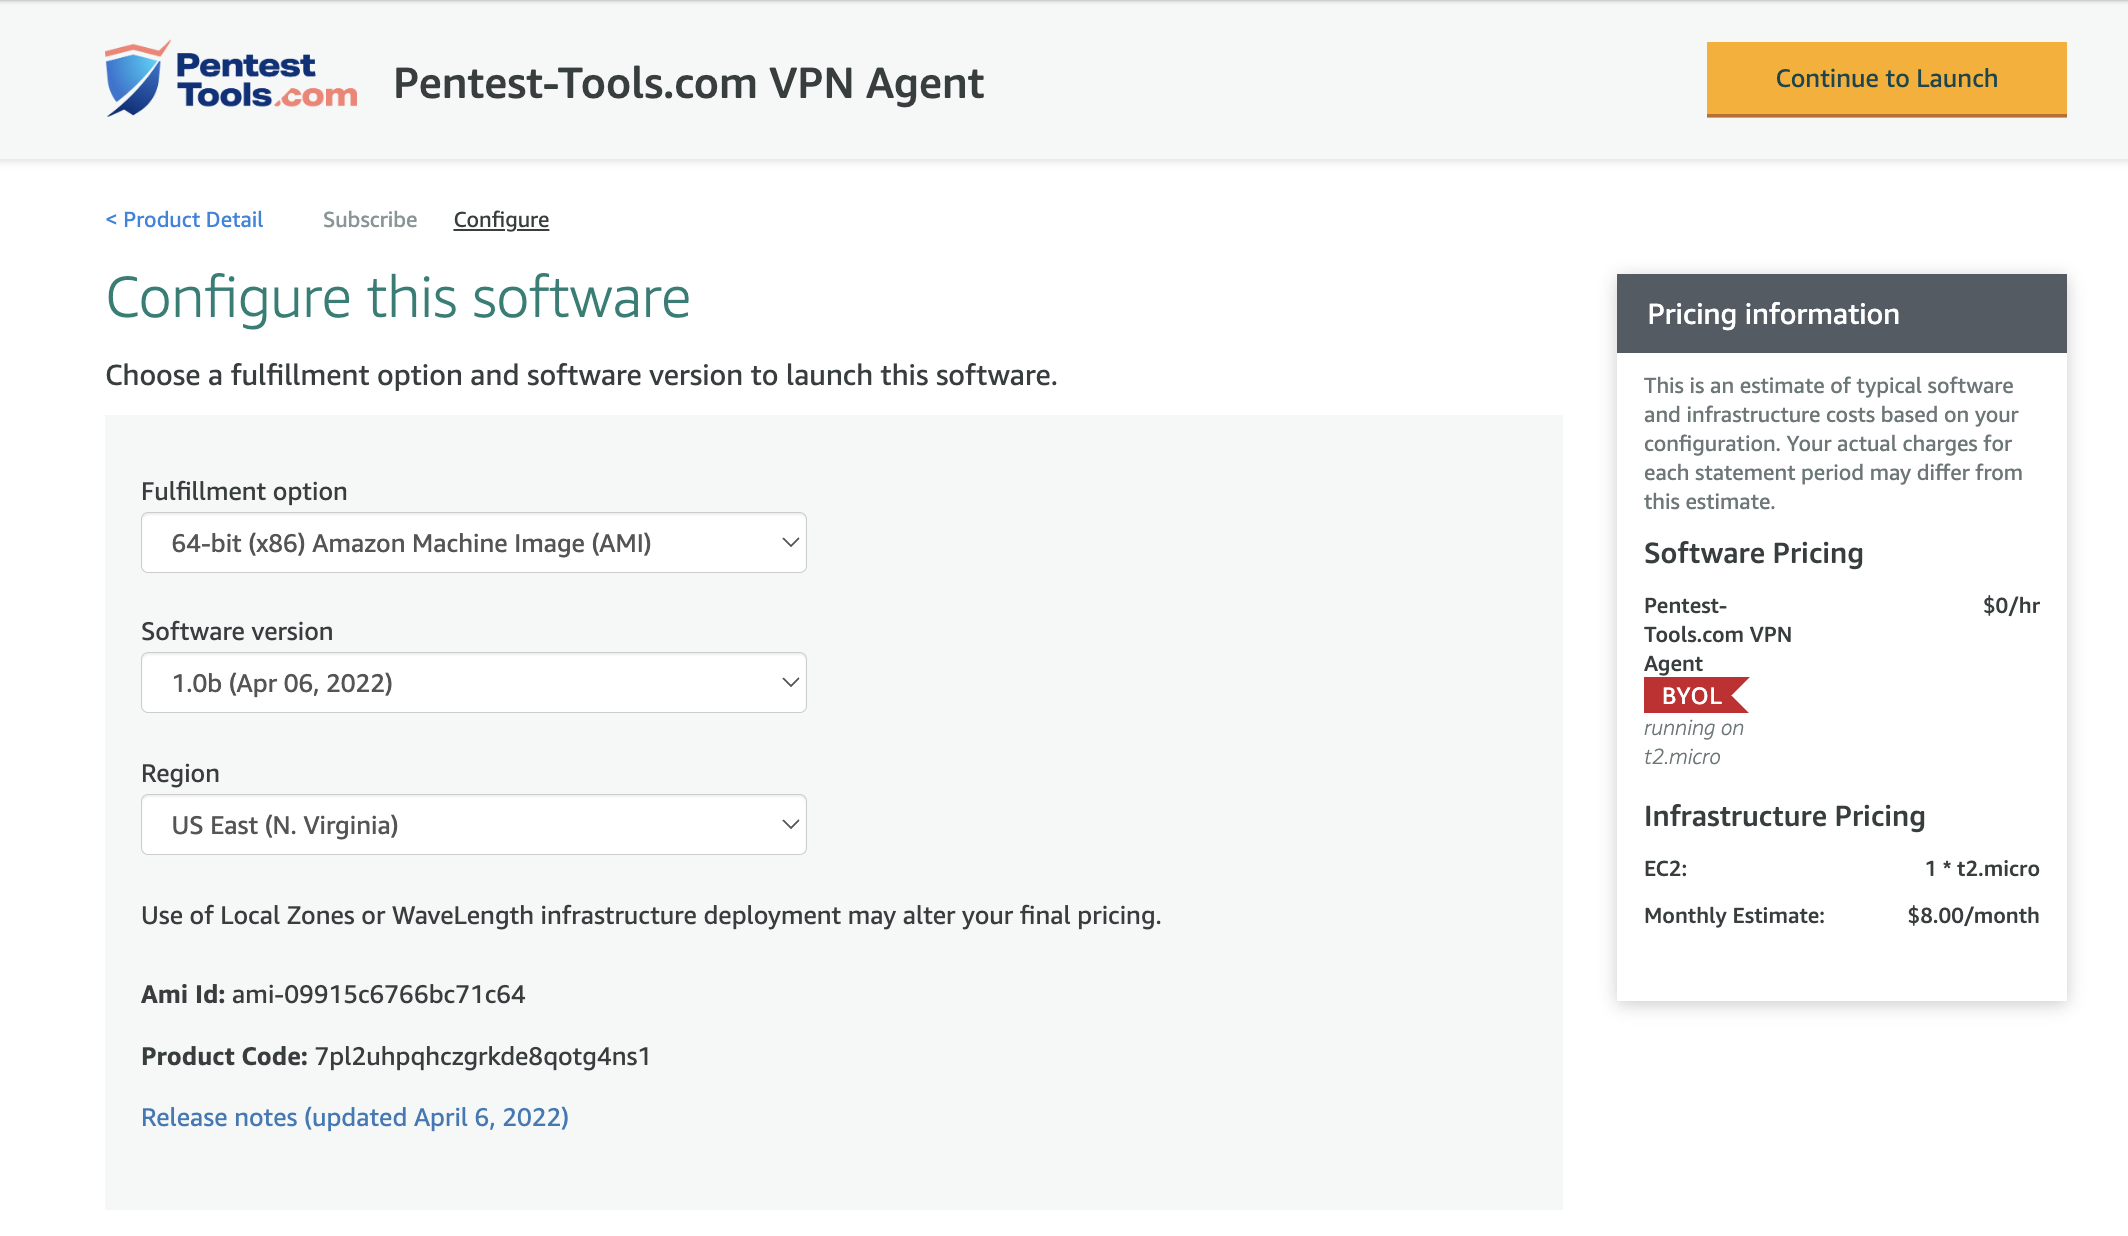
The recommended Instance Type is t2.micro since the appliance does not require more than 1GB of memory.
It might be faster to use the option Launch from Website.
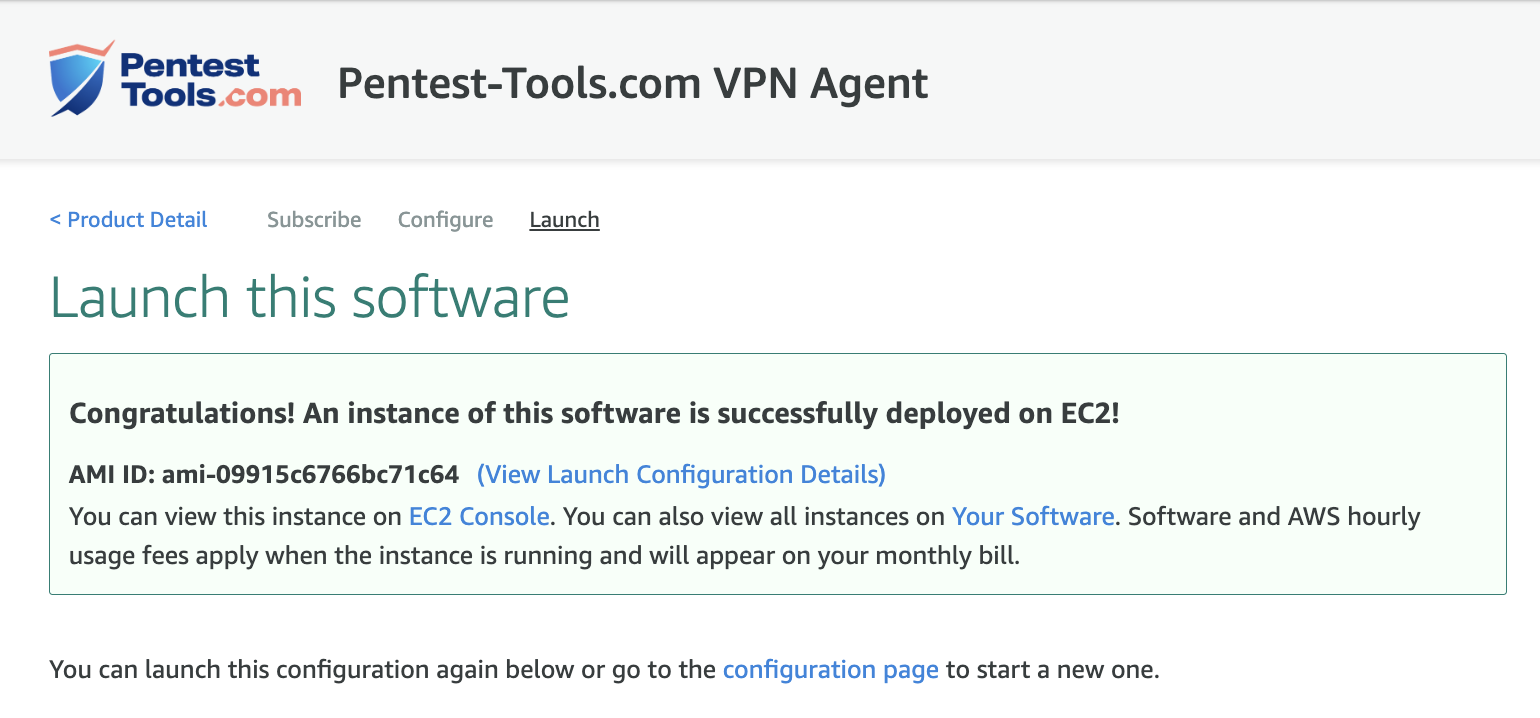
Make sure that you back up your key pair and click Launch.
Step 3: Synchronize the deployed Agent with your Pentest-Tools.com VPN Profile
The EC2 running the AWS Agent has an open SSH port (22) that you can connect to. Using your private key generated by AWS from the last step of the launching process you can connect as follows.
As described in the AWS EC2 User Guide, please follow these quick four steps:
- Open an SSH client.
- Locate your private key file.
- Run this command, if necessary, to ensure your key is not publicly viewable.
chmod 400 key.pem - Connect to your instance using its Public DNS:
Here’s a quick example: ssh -i "key.pem" ubuntu@public_dns_example.com
If the connection is successful, you’ll receive a welcome message from Pentest-Tools.com.
You can also use the Amazon EC2 console (browser-based client) if you find this more convenient (there is no SSH client required).
Use the user name ubuntu.
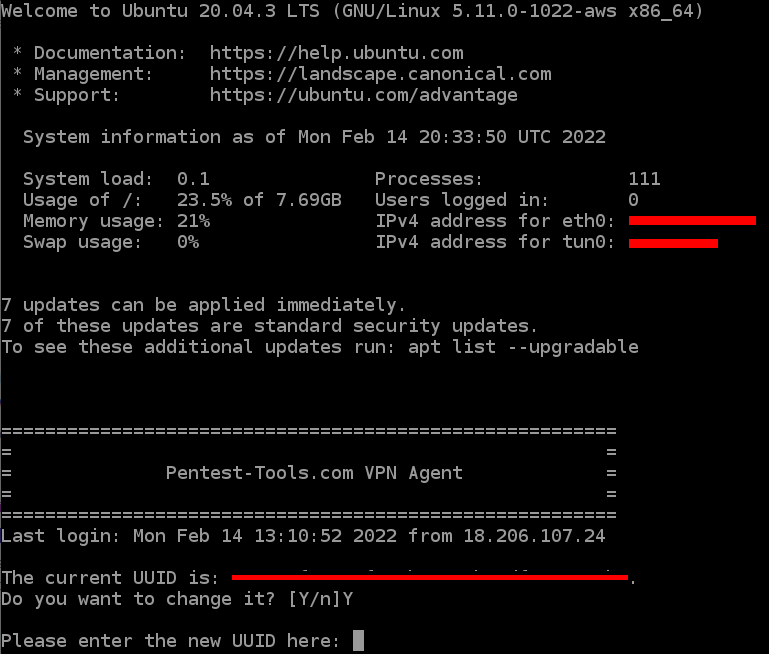
From here, the agent prompts you to enter a new VPN Profile UUID, so all you need to do is copy and paste it from Pentest-Tools.com VPN Profiles.
The agent saves the UUID and starts the VPN Agent.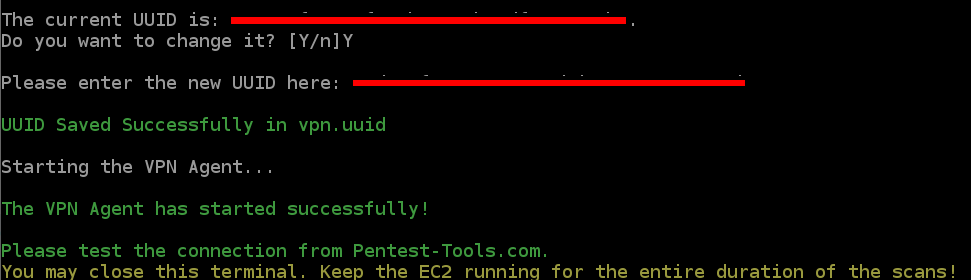
Step 4: Test the VPN Connection from your account
After the AWS Agent is successfully connected, test the connection from your account. Go back to the VPN Profiles page and press the Test Connection button for the profile you’ve just created. A success message should appear as below:
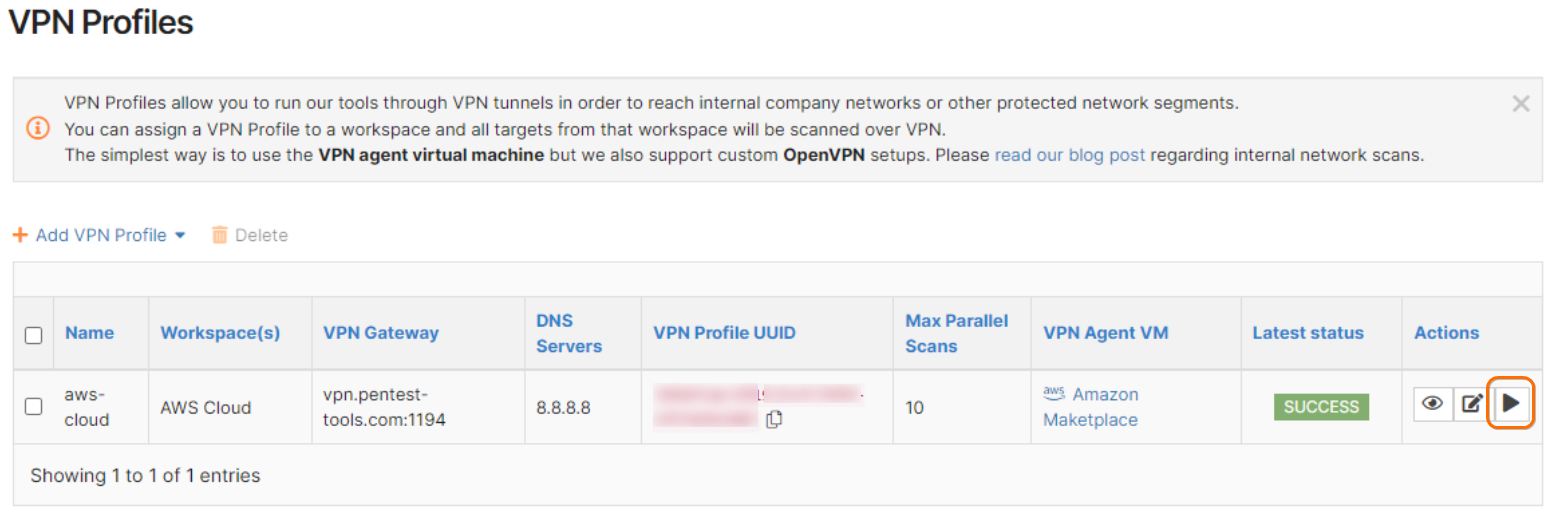
If the test connection fails, please repeat Step 3 and double-check the VPN Profile UUID.
Note: Don’t forget to keep the EC2 running the AWS VPN agent for the entire duration of the scans.
Congrats! 🎉
You’ve successfully configured the AWS Agent and you can start scanning your infrastructure.